
Choose the Best Background 3
Welcome to week 3 in our series about Choosing the Best Backgrounds using Venus® 1500 v4 software. If you missed our previous posts, view “Choosing the Best Backgrounds 1” and “Choosing the Best Backgrounds 2.” This week, we’ll take a look at using Custom Colors. Using custom colors gives you A LOT more options when it comes to […]
Daktronics Commercial Software Training on 3/20/2015
Categories: Venus 1500 Training
Welcome to week 3 in our series about Choosing the Best Backgrounds using Venus® 1500 v4 software. If you missed our previous posts, view “Choosing the Best Backgrounds 1” and “Choosing the Best Backgrounds 2.”
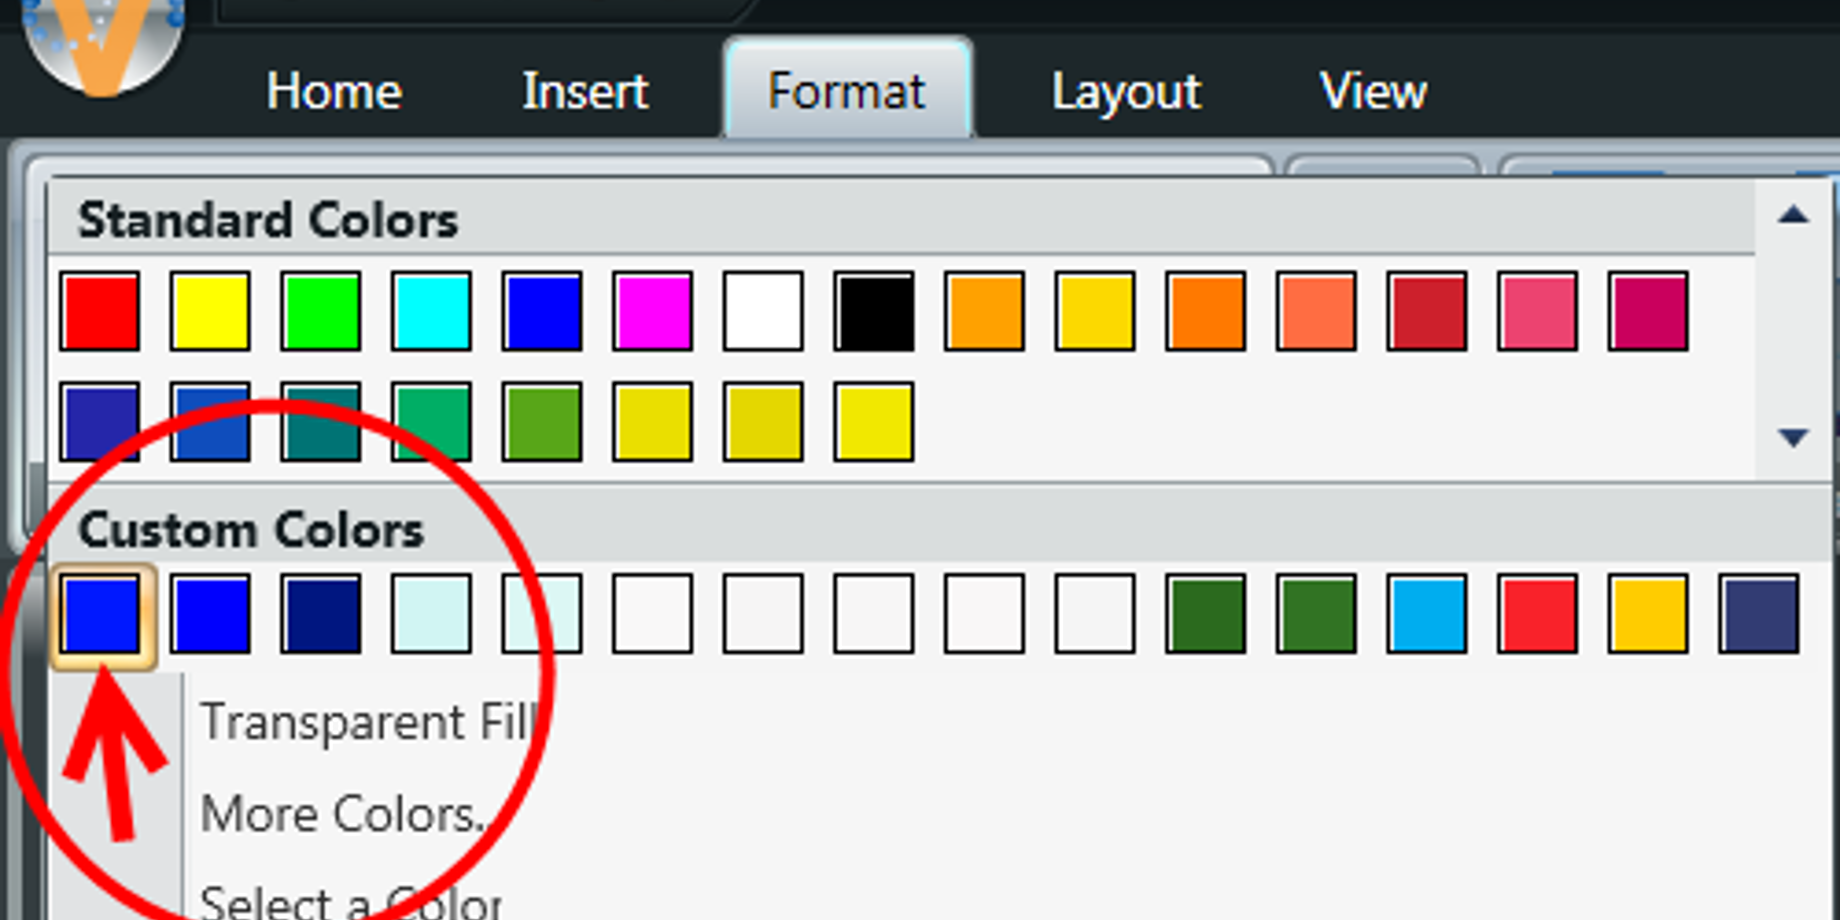
This week, we’ll take a look at using Custom Colors. Using custom colors gives you A LOT more options when it comes to choosing a background color. Plus, it’s fun AND easy!
First, go to the Format Tab, and click on the More Button. Then click More Colors…

More Button

More Colors
This will open the Select a Color window. Here, you simply click and drag the cursor until you find a color you like! First click and drag on the vertical column of colors, then once you have a color chosen, click and drag the circle until you find the shade you want. As you can see in the picture below, you can also enter in your own custom RGB values if you know them, and have a custom color you would like to use.

Select a color
There is also an option under the More Button to Select a Color. So if you import your own business logo and want to add additional text in the same color, you can create it as a custom color by clicking the eye dropper on the logo. Then you can use that color for text or backgrounds. This is a great trick if you do branding!
To create custom color, choose Select a Color from the drop down menu.

Select a Color
Move your mouse over the color you want to replicate. Left click one time to create the color as Custom and to fill the background. Note that your mouse turns into an eyedropper as it moves over the graphic. Once you have selected the color, the cursor goes back to an arrow.

Eye dropper
Back to an arrow
When you go back to the colors drop down, you’ll see the new color is saved in your Custom Colors section.

Custom Colors section
We created a Custom Color under the Format tab for a background. But you can do the same thing under the Fonts Color section too. We can see the blue we just created is also available for font color!

Fonts Color section
That’s all for now. Please be sure and check back next week for more information about using the best backgrounds. Thanks again!