
Line Spacing: The Final Frontier
Have you ever wanted to move lines of text in a message closer together or farther apart? Have you ever wished you could squeeze your entire message into one slide or layout but couldn’t because there was too much space between lines of text? Trainer Tip: We don’t recommend trying to squeeze multiple lines of […]
Daktronics Commercial Software Training on 10/12/2016
Categories: Venus Control Suite Training

Have you ever wanted to move lines of text in a message closer together or farther apart? Have you ever wished you could squeeze your entire message into one slide or layout but couldn’t because there was too much space between lines of text?
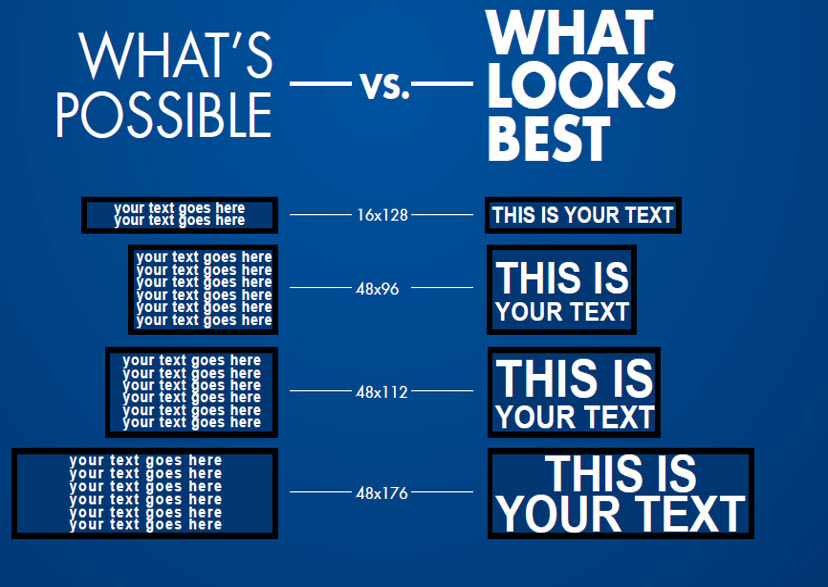
Trainer Tip: We don’t recommend trying to squeeze multiple lines of text onto your LED display as that does not run the most effective content. It is better to create brief messages in a font size that fills your entire display like the example shows below. However, we do realize that with some fonts, the default line spacing can leave you struggling to do even that, which is why you should keep reading!
If you answered yes to either of the above questions, then you’re in luck. Today, we are going to show you how to adjust the amount of space between lines of text.
First, we are going to show you how to do so in the Web Compositor, aka the Web Editor.
WEB COMPOSITOR
Go ahead and launch the Web Compositor from your Media Library by clicking on the arrow next to the blue upload button and choosing New Web Compositor presentation. To begin, give it a name and choose your display size .
Now you can start creating your message. First, choose the text element above your slide and then type your text into the text field under properties. For this example, make sure you have at least 2 lines of text, since we are going to be showing you how to move them closer together or farther apart.
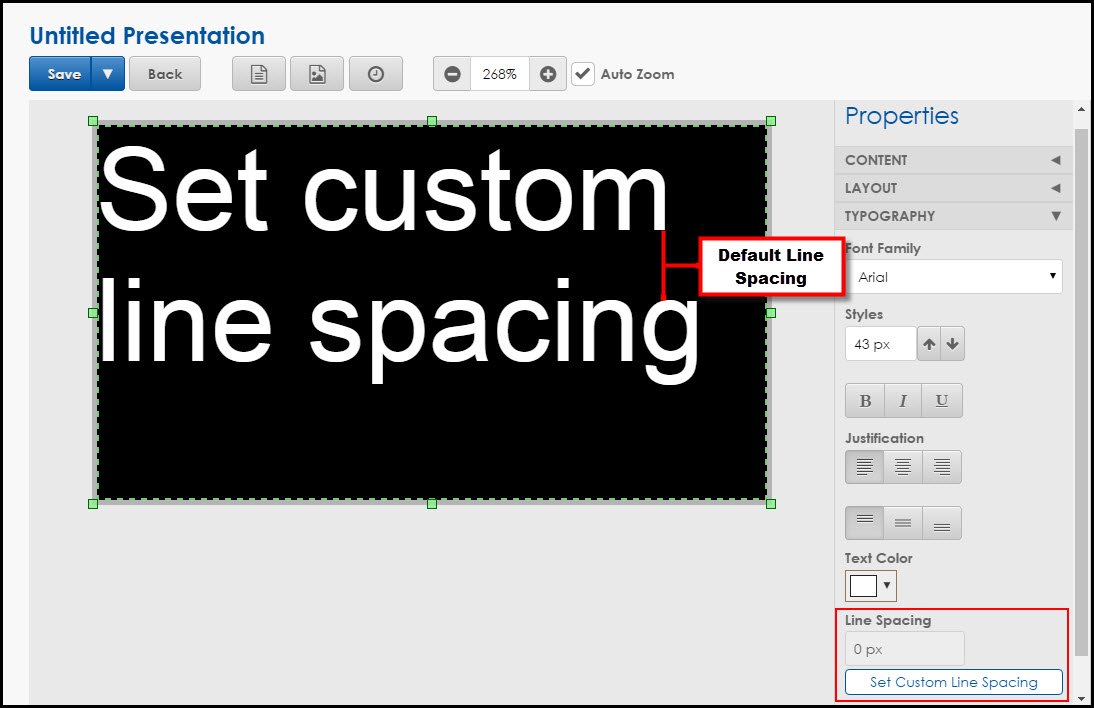
In order to adjust your line spacing you will have to click on the Typography dropdown menu. At the very bottom of that menu you will see a Line Spacing section set at “0 px.” This is the default line spacing for the particular font that you chose for your message.
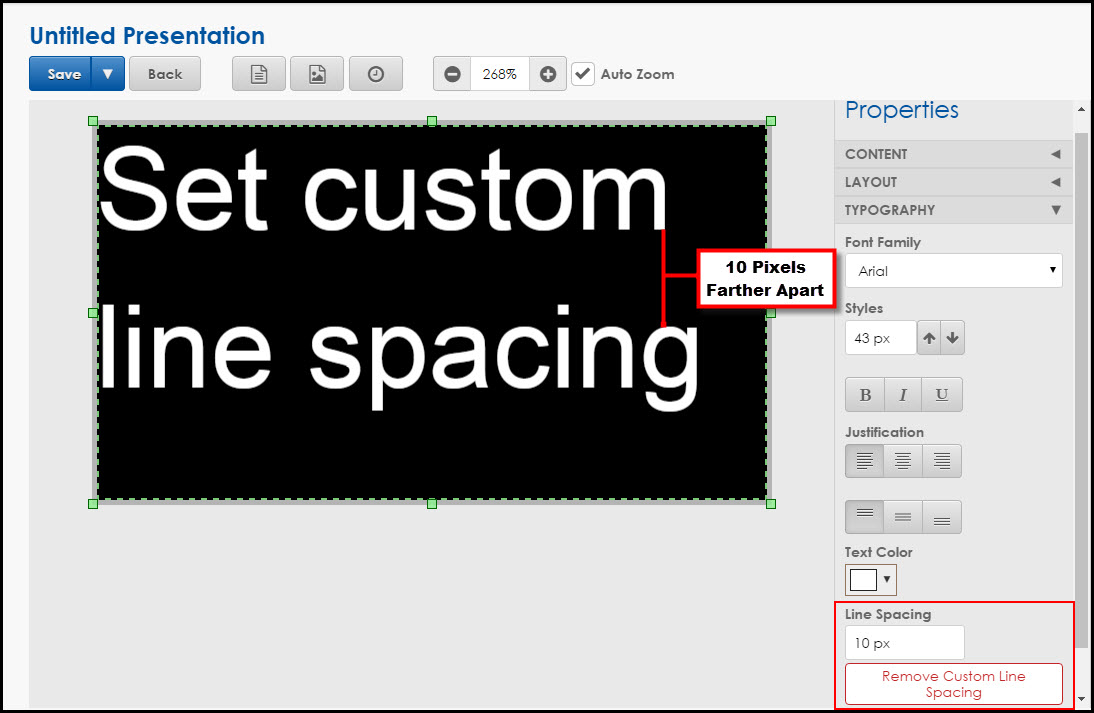
Go ahead and click on the blue button that says “Set Custom Line Spacing.” Clicking on that button will allow you to type into the Line Spacing field and choose how close together or far apart your lines of text are.
If you type in a positive number, it will move your lines of text that many pixels apart.
If you type in a negative number, it will move your lines of text that many pixels closer together.
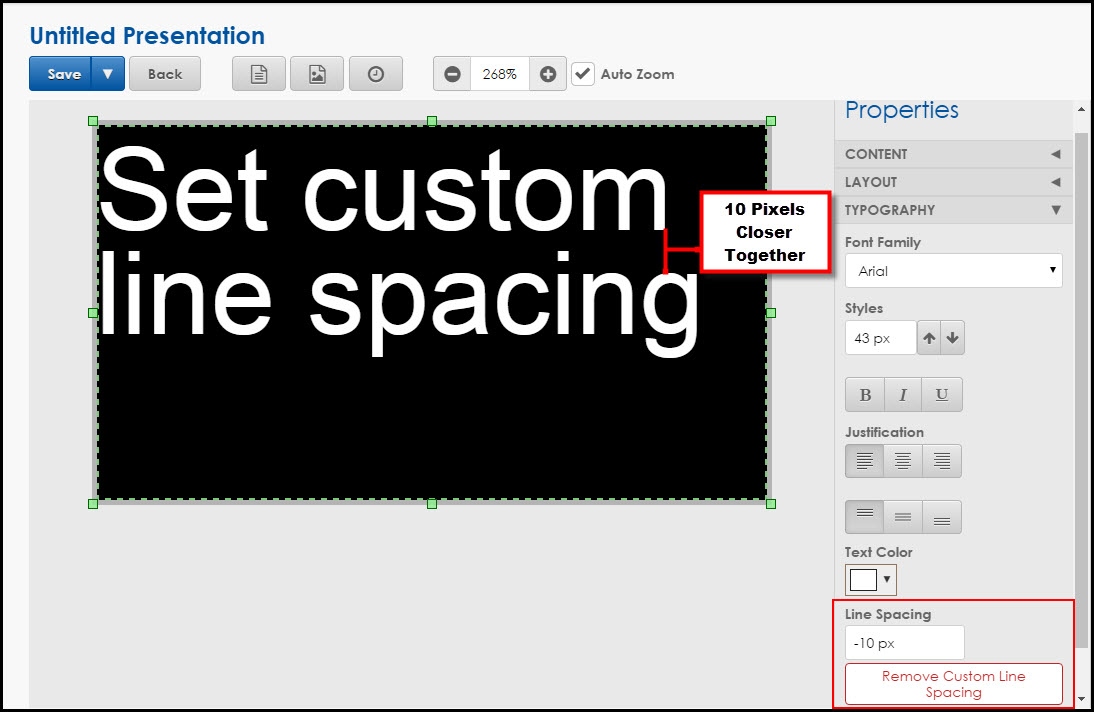
If you want to remove the line spacing selection that you typed in, just click on the red Remove Custom Line Spacing button to go back to the default setting.
That’s right folks, it’s that easy! Don’t forget to click Save when you’re finished!
CONTENT STUDIO
Did you know that Content Studio also gives you the ability to move lines of text and even the individual letters in words closer together or farther apart?
Now you know!
The best part about using this feature is that it is very quick and easy. Plus, it gives you the ability to move your lines of text or your letters 1 pixel at a time, so you literally have every possible option available.
To begin with, you will decide how you are going to enter your text into your layout. You can type your message directly into the layout by double-clicking on it. Once you see the blinking cursor you can begin typing.
Or you can insert a text box from the Home or Insert tab by clicking on the Text Box button and then clicking and dragging it into your layout. Now, you will see a gold border that you can type into.
If you chose to type directly into your layout, then you will want to click and drag to highlight your message before following the instructions below.
If you chose to use a text box, then you will want to click outside of it in order to see the green border around your message. If you can see the green border, then you can proceed with the below instructions.
Add Space Between Lines
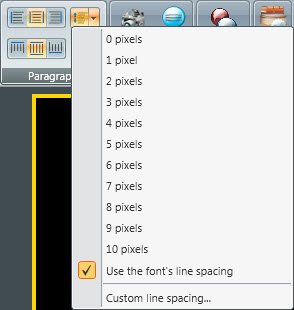
Click the Line Spacing tab, in the Paragraph group, on the Home tab.

The font’s assigned line spacing is the default setting. The line spacing function places space between lines without highlighting text.
Choose the number of pixels (points) to include between the lines of text from the Line Spacing drop-down menu. Pixel widths range from 0 to 10. The larger the number, the more space between the lines.
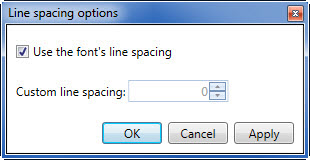
Trainer Tip: You can also click on Custom Line Spacing to adjust the number of pixels between lines of text. First uncheck the “Use the Font’s Line Spacing” checkbox, and then use the arrows to move your lines of text closer together or farther apart. Negative numbers move lines closer together.
Change the Space Between Letters/Character Spacing
Go to the Home tab, in the Fonts group, click the Character Spacing button.
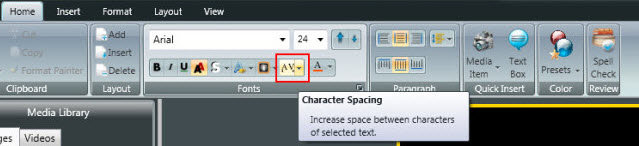
The default spacing is the character spacing default.
Choose the number of pixels between the letters/characters from the Character Spacing drop-down menu. Pixel widths range from 0 to 10. The larger the number, the more space between the letters.
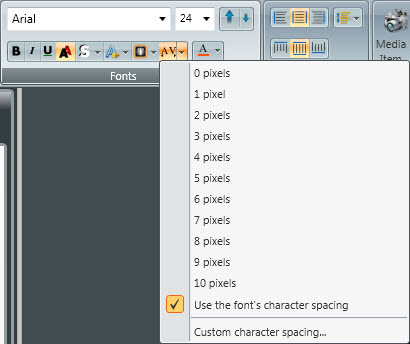
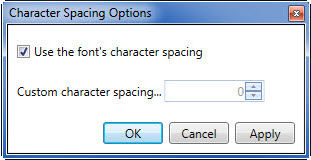
Trainer Tip: You can also click on Custom Character Spacing to adjust the number of pixels between characters. First uncheck the “Use the Font’s Character Spacing” checkbox, and then use the arrows to move your characters farther apart.
P.S. Whether you’re using the Web Compositor or Content Studio to adjust the line spacing in your messages, be sure to leave some space between the lines of text. You don’t want to have lines of text overlapping (touching or on top of each other) because then people won’t be able to clearly read and understand your messages as they pass by!
We hope you found this week’s post helpful! Be sure to click on the orange “Receive Email Updates” button on the right side of the screen to subscribe.
Thanks for reading!