
Create Scrolling Images in Content Studio!
Do you have an image that’s too large for your display, and cropping and resizing the image just isn’t an option? If so, you can use Content Studio to scroll the image across your screen so everyone can see it! This works by adding the graphic to multiple layouts and then using the transitional effects […]
Daktronics Commercial Software Training on 5/10/2017
Categories: Venus Control Suite Training
Do you have an image that’s too large for your display, and cropping and resizing the image just isn’t an option? If so, you can use Content Studio to scroll the image across your screen so everyone can see it!
This works by adding the graphic to multiple layouts and then using the transitional effects to make those same images scroll. Let’s break it down step-by-step, shall we?
Importing the Image into multiple layouts
- You will first have to resize the image to match the width of your display. You can use free online programs like Pixlr or the Online Image Editor to do this.
- Next you will launch and log into Content Studio.
![Launch Content Studio]()
- Once you are in Content Studio, you must click on Media Item on the Home ribbon and select Picture. This will allow you to browse to your resized image and then click Open to Import.
![Media Item]()
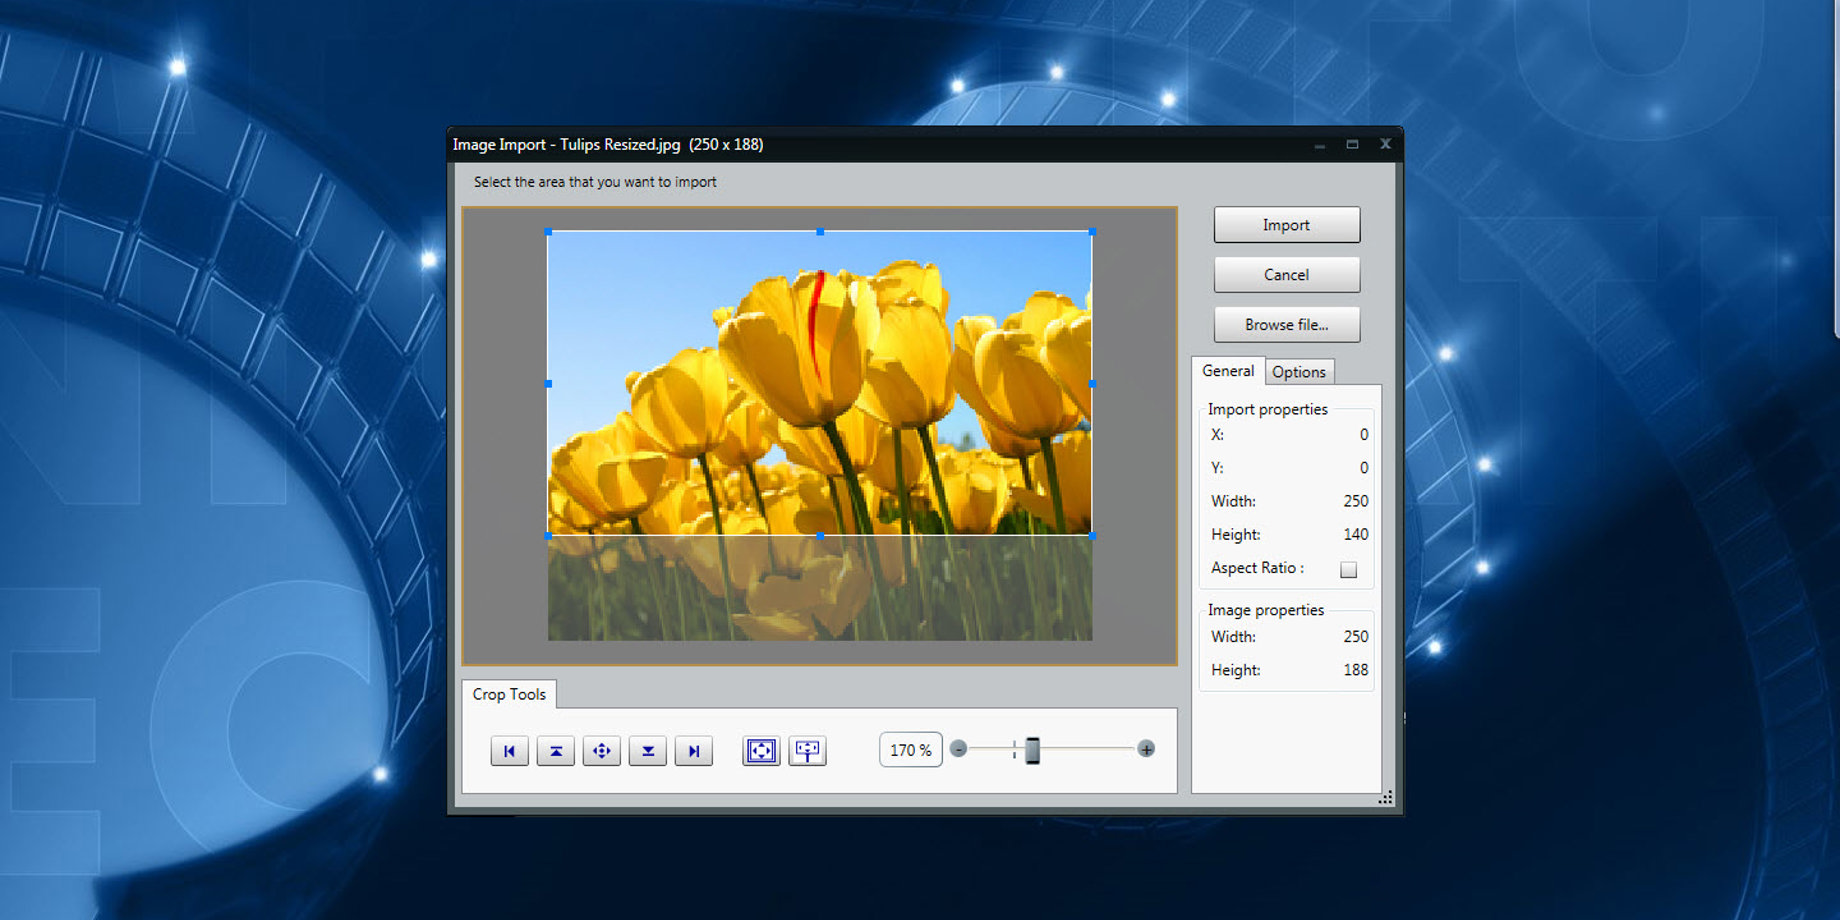
- In the Image Import Window, click on the Crop to Display Icon to select a portion of the image the matches the display dimensions.
![Crop to Display]()
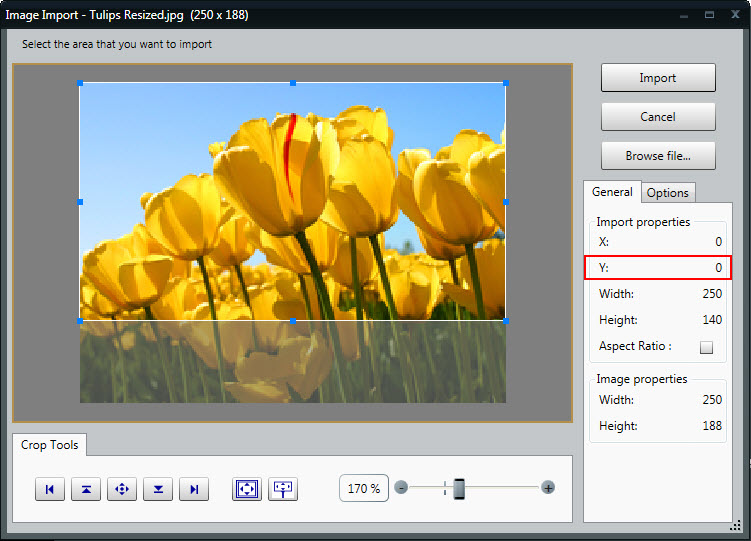
- Click and drag the white box to the very top of the image. The Y-Coordinate under the General tab on the right side of the Image Import Window should have a value of zero.
![Image Import 1]()
- Click the Import button to place that portion of the image into your Layout. If your display is 140 pixels high, then you will have just imported the first 140 rows of pixels.
- Add a second layout to your presentation and repeat steps 3 and 4.
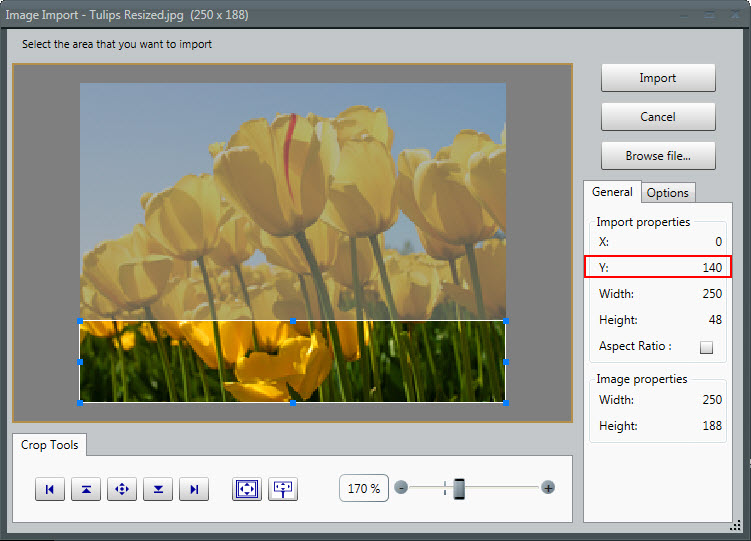
- Click and drag the white box to the next portion of the image that needs to be imported. You will be importing the remaining pixels this time, so look at your Y-Coordinate again, and make sure it has a value of 140.
![Image Import 2]()
- Click on the Import button to place the next portion of your image into the second layout.
- Continue to add layouts and import additional portions of the image until the entire image has been imported. If the full image has been imported using only 2 layouts, a third layout may be added to push the image up as it scrolls.


Making the Image Scroll across multiple layouts
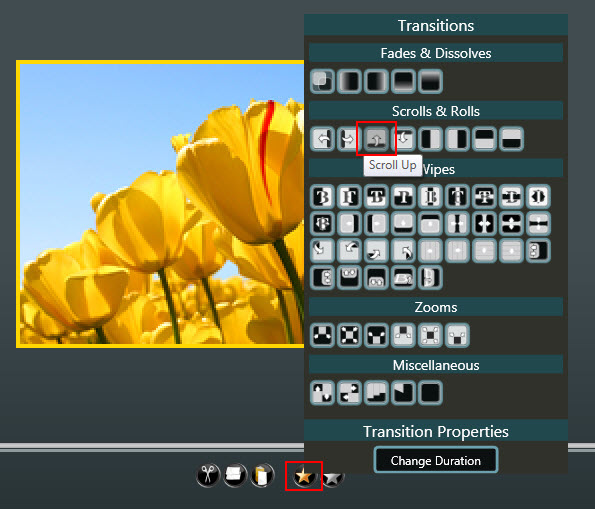
- Within the layout storyboard, click on the Gold Star icon and choose the Scroll Up transition to apply it to all the layouts in your presentation.
![Scroll Up]()
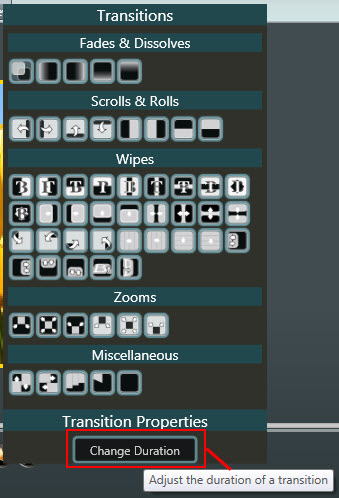
- To make it appear that the entire image is scrolling together you must change the duration of each layout to 0.10 seconds. This is easier to accomplish in the Layout Storyboard, so you may want to disable the Timeline while working on this presentation.
![Duration]()
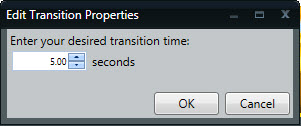
- Slow down the speed of the scroll by clicking the Gold Star in the storyboard and selecting the Change Duration button. The larger the number, the slower the transition. For our example, we chose 5 seconds.
![Transition duration]()
![Edit Transition]()

Take a look at the video below to see what a scrolling graphic looks like. We hope you find this information useful in your future endeavors with your display.
Be sure to subscribe to our blog by clicking on the orange ‘Receive Email Updates” button on the right side of your page. Thanks for reading!