
How to Import Your Own Media into Content Studio
Learn how to properly create, find and import your own media files into Content Studio.
Daktronics Commercial Software Training on 5/17/2018
Categories: Venus 1500 Training
Did you know that you can import your own pictures or videos into Content Studio? That’s right, in addition to all the content from the Free Media Kit, you can also browse your computer for your own files.
Today we will show you how and give you some guidelines to ensure the media you import is of the best possible quality.
We have previously posted about importing content on a handful of occasions, so it would be most beneficial for you to review these posts whenever possible. Click the links below to get started!
- Importing Headshots with Busy Backgrounds
- Importing Headshots – Cropping and/or Resizing
- Creating Outstanding Headshots in Content Studio with an Online Photo Editor
- Importing & Creating Headshots Revisited
- Importing a Video/Animation as a Still
In today’s post, we are going to keep things very simple for you. First, we will discuss how to import your own media files, and then we will provide you with some recommendations and requirements to follow when importing.
How to Import
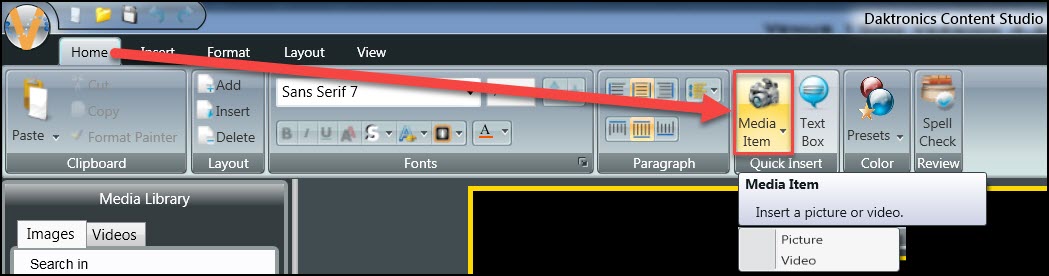
You can import your own files into Content Studio in a few different ways. The quickest way is to click on the Quick Insert group in the Home Tab. Simply click on the Media Item button and then choose between Picture or Video. This will allow you to browse your computer and find the file you want to import.
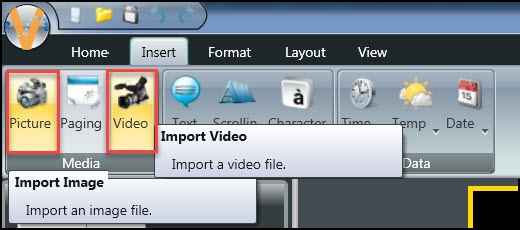
The second way to import files, which takes exactly one click longer, can be found in the Insert Tab. Simply choose between Picture or Video in the Media group and then click to browse your computer.
You can learn more about the Home and Insert Tabs by reading our recent blog posts below.
- Keeping Tabs on Your Tabs: The Home Tab (Content Studio)
- Keeping Tabs on Your Tabs: The Insert Tab (Content Studio)
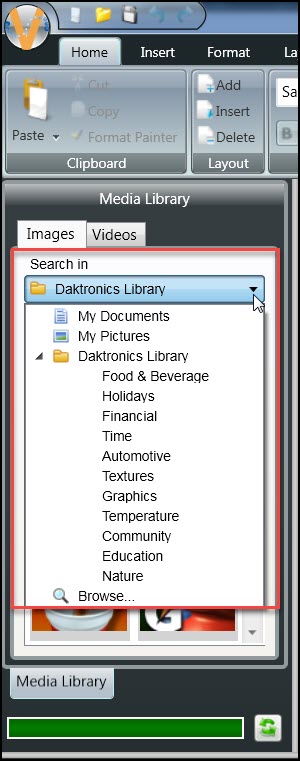
The final way that you can import your own media files into Content Studio is through the Media Library. Not only can you import all the Free Media Kit content, but you can also search your own computer.
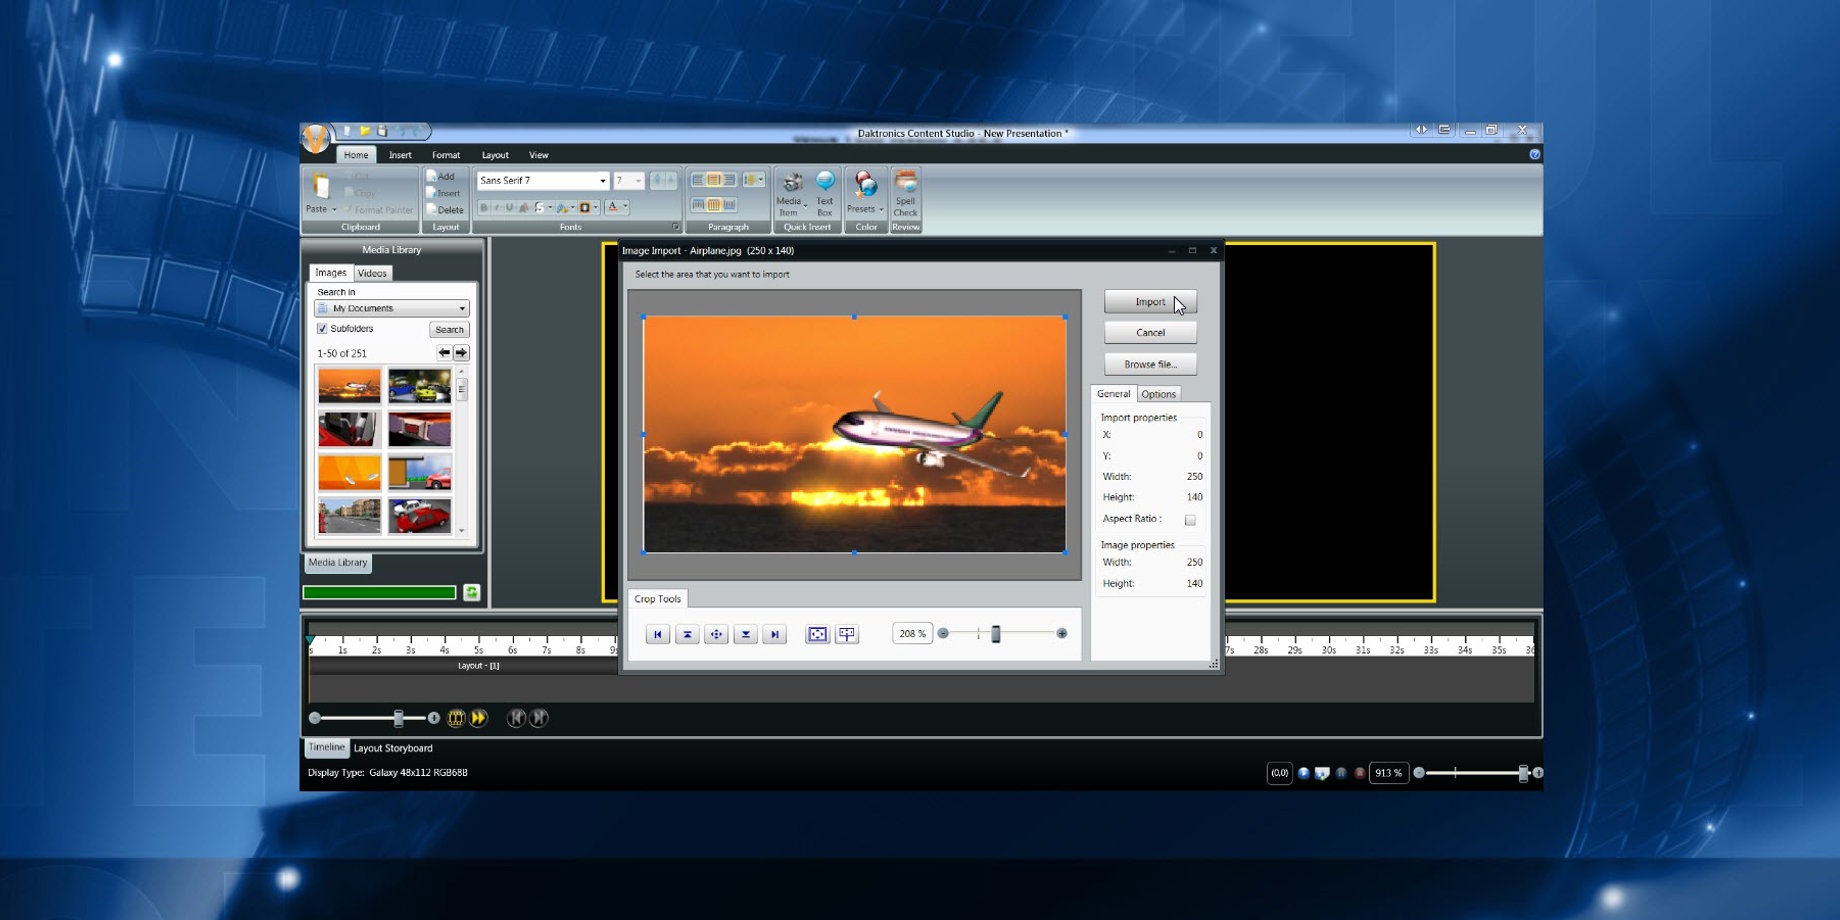
Click on the Search In drop-down menu and you will see several options to choose from. Now all you must do is decide where you want to search and then click on it. You can choose to browse My Documents, My Pictures, Daktronics Library, or even Browse your entire computer.
The best part is, once you’ve selected where you want to search, all the files in that location will appear in your Media Library so you can easily double click or click and drag them into your Layout.
Remember that Content Studio will always save your last search location and revert to it the next time you open Content Studio. So, if you ever open Content Studio and see that your Free Media Kit is missing, don’t panic! Just click on the Search In drop-down menu again, choose Daktronics Library and click the Search button.
Trainer Tip: Did you know that you can place text on top of images and videos after you have imported them into Content Studio? Always use text boxes to do this. You cannot edit or delete text typed directly into a layout on top of a picture or video. Click below to learn how to properly add text to a layout with a picture or video in it.
File Specifications
Whether you’re creating content in a 3rd party program like Adobe PhotoShop or Illustrator, finding content online or even taking pictures using your camera, you must meet certain file requirements. Click the links below to view the file requirements before you import anything into Content Studio.
- What are the requirements for creating graphics or images in Venus 1500 V4?
- What are the requirements for creating animations or videos in Venus 1500 V4?
In addition to the supported file types, always try to follow best practices. Set the DPI (dots per inch) at 72 for the best results on a digital display. The pixel size should closely match your display.
A good rule of thumb when creating or resizing graphics and animations: don’t make them any larger than 3x the pixel dimensions of your display. For example, if your display is 48 x 112, you’ll get the best quality by making sure any pictures or videos you import are no larger than 144 x 336.
Most images on the internet have dimensions in the thousands because, for the most part, they are high resolution. The larger the image, the more pixels that need to combine to fit onto the available display matrix. Thus, if you are starting out with an image that is more than 3x larger than your display dimensions, you will lose image quality, and it will look blurry and pixelated.
It is possible to resize images using programs like Adobe Photoshop or other free programs like Pixlr or the Online Image Editor. However, stick with our rule of thumb and don’t start with an image larger than 3x your display dimensions to ensure the best quality result.
We hope this information helps you find and import the best possible content for your Daktronics display.
Be sure to click on the orange “Receive Email Updates” button on the right side of the page to subscribe. Thanks for reading!