
Using the Timeline Part 5
Tips for changing the duration of items in the Timeline In our previous articles about the Timeline in Venus® 1500 software Content Studio, we told you about the direct connection between objects in the Timeline and objects in the Content Editor. For example, when you select an object in the Timeline, the same object is […]
Daktronics Commercial Software Training on 7/23/2014
Categories: Venus 1500 Training
Tips for changing the duration of items in the Timeline
In our previous articles about the Timeline in Venus® 1500 software Content Studio, we told you about the direct connection between objects in the Timeline and objects in the Content Editor.
For example, when you select an object in the Timeline, the same object is selected in the Editor; when you delete an object from the Timeline, it is also deleted from the Editor. In fact, it is the same object shown both in the Content Editor and in the Timeline.
Using the Timeline, you can adjust the moment an object appears in the presentation and the duration it stays up on your display. You can adjust objects using the right click menu to “Size To Longest,” “Size To Shortest,” “Size Selected to Me,” or “Match Layout.”
If you hold the Control key (Ctrl) down and select multiple objects in the Timeline, you can then right click on an object with the desired length to make them all the same size.
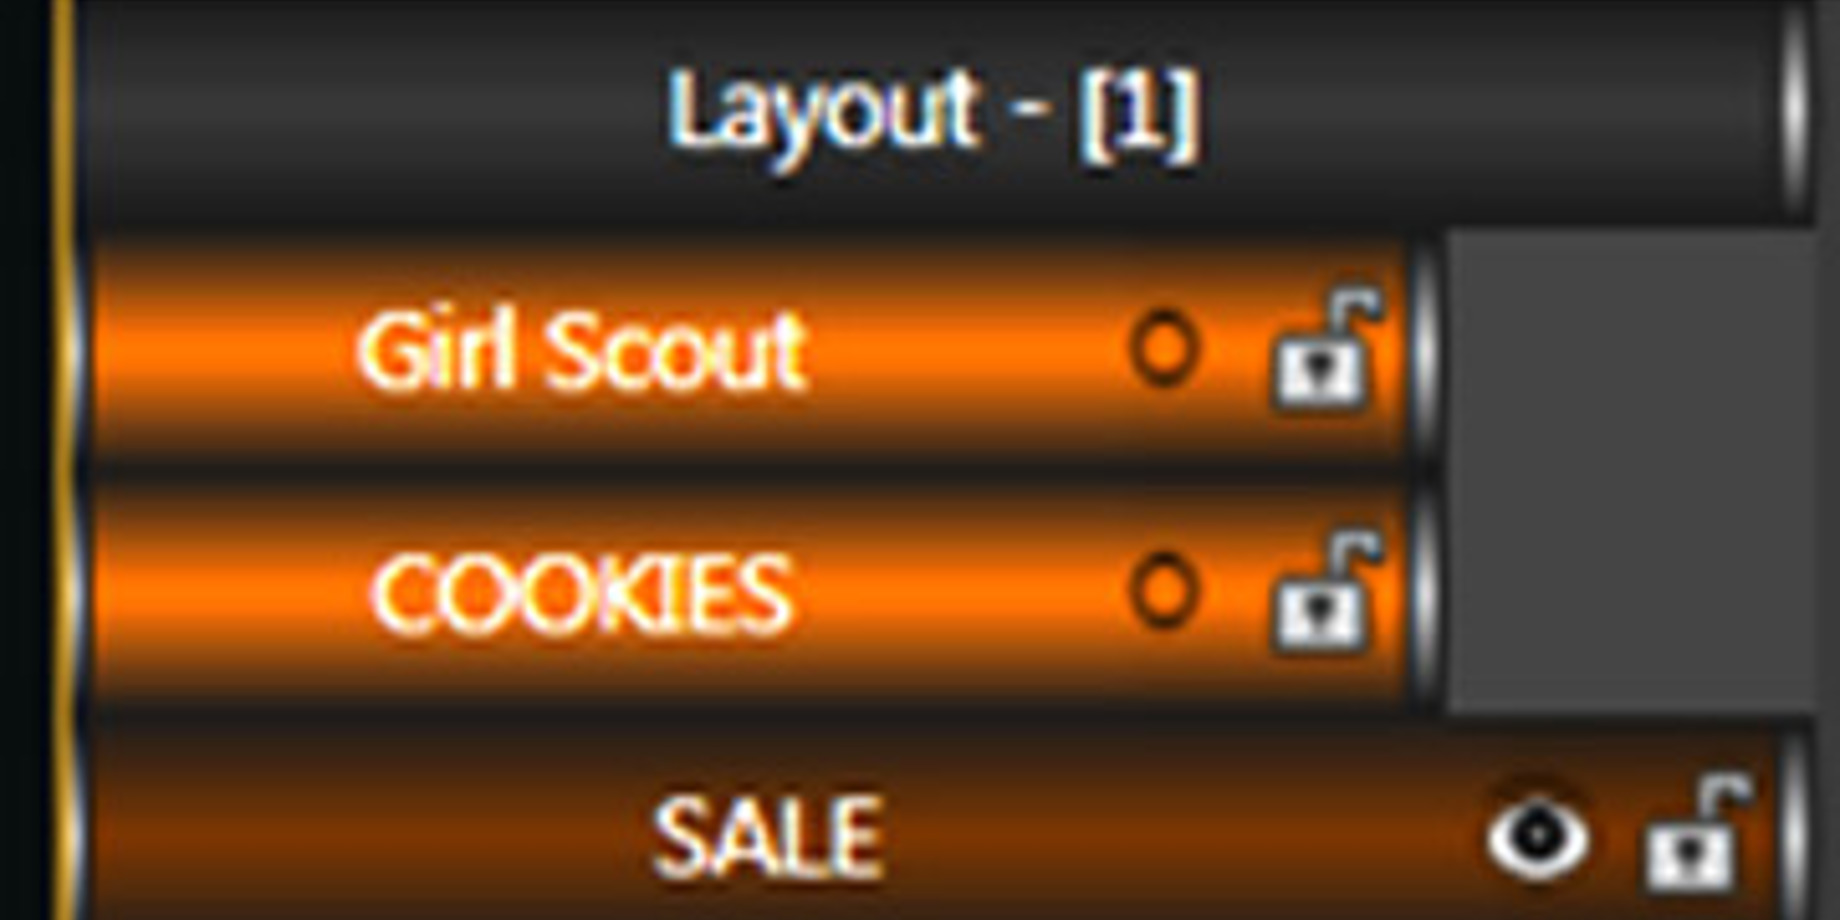
In the screenshots below, we are resizing the top two objects (Girl Scout and Cookies) to be the same duration as the bottom object (Cookie.bmp) using “Size Selected to Me.”
To resize all at the same time, you can also hold the Alt key and drag a layout along with everything under it.

Add objects to a layout (in this case, text boxes and a graphic).

Stretch out the graphic and a text box to the desired duration.

Hold down the Ctrl key and left click on each object to change.
With the Ctrl key still down, click on Cookies.bmp, then right click to choose, “Size Selected to Me” or another option you desire. We are choosing “Size Selected to Me” so that “Girl Scout” and “Cookies” change to the size (duration) of the Cookies.bmp.

Right click and choose, “Size Selected to Me.”

“Girl Scout” and “Cookies” now the same duration as the Cookies.bmp
This feature is especially helpful when you have a number of objects on a layout and then decide to change the durations.
Look for our next post: tips on planning an ad campaign for your LED sign. Don’t just manage your sign; drive ROI!