
Laying Out the Layout Storyboard
We recently posted about the Timeline and how great it is, but the Layout Storyboard isn’t just there for aesthetics, it’s actually quite functional and easy to use. In fact, many people that I have talked to much prefer the Layout Storyboard over the Timeline. When I ask why they prefer it, the overwhelming response […]
Daktronics Commercial Software Training on 5/3/2017
Categories: Venus 1500 Training
We recently posted about the Timeline and how great it is, but the Layout Storyboard isn’t just there for aesthetics, it’s actually quite functional and easy to use. In fact, many people that I have talked to much prefer the Layout Storyboard over the Timeline. When I ask why they prefer it, the overwhelming response is its simplicity.
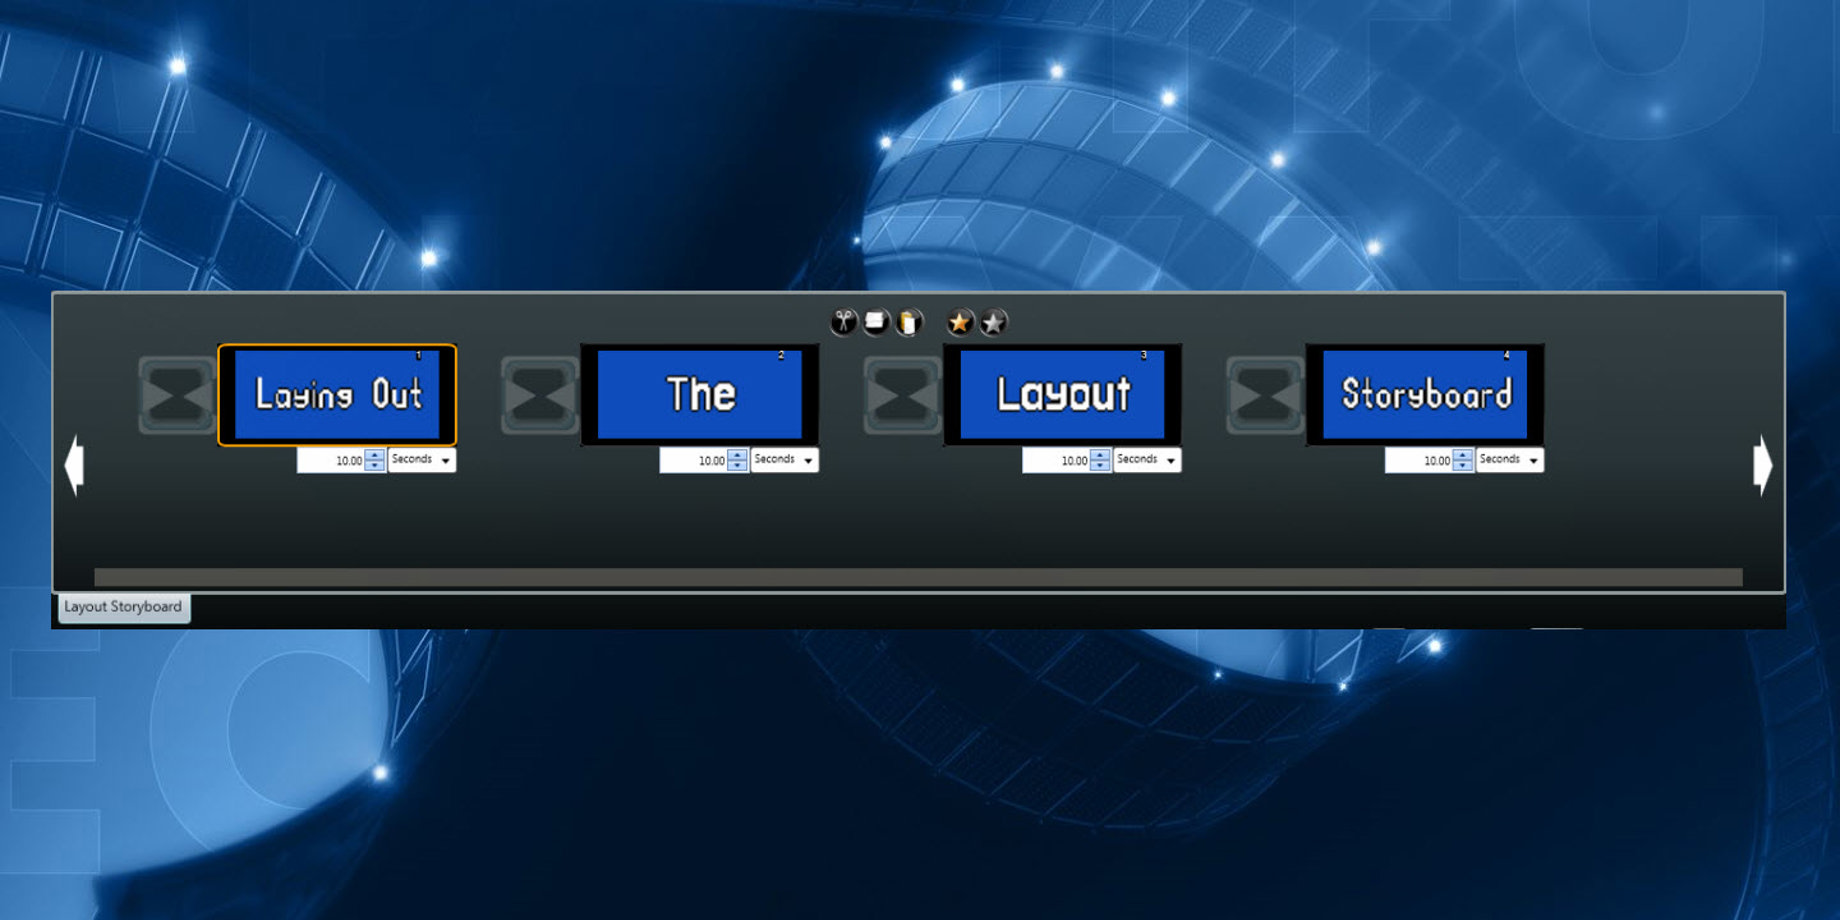
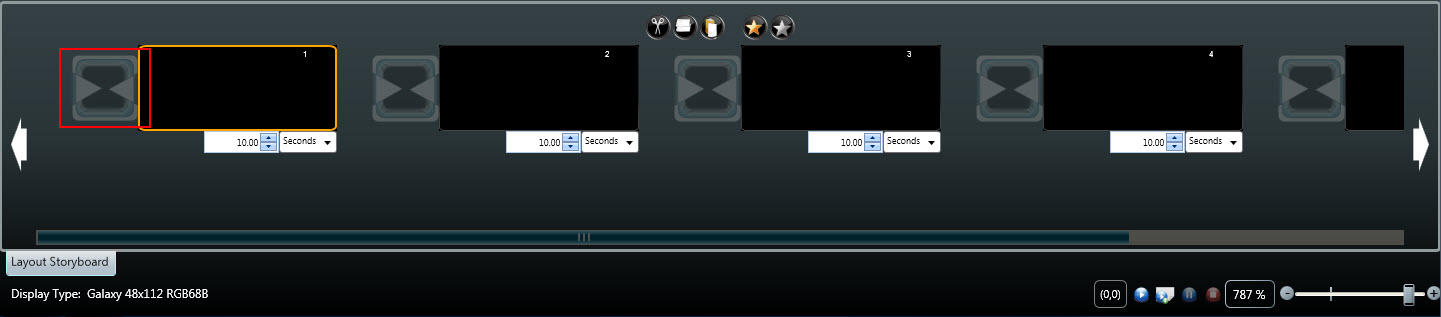
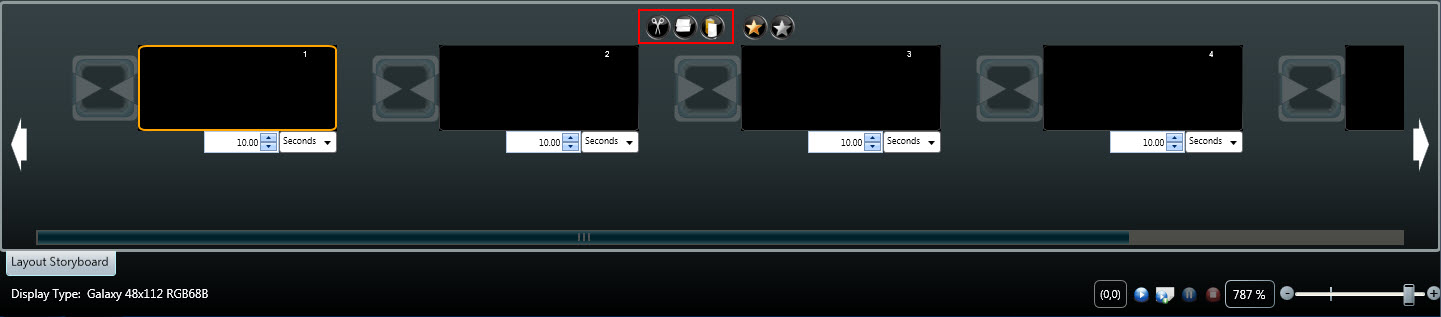
The Layout Storyboard is the default setting upon the installation of the Venus 1500 V4 software. It appears below the Layout and Media Library. You can view miniature representations of each layout in your presentation within the Layout Storyboard. Each miniature layout will be numbered accordingly.
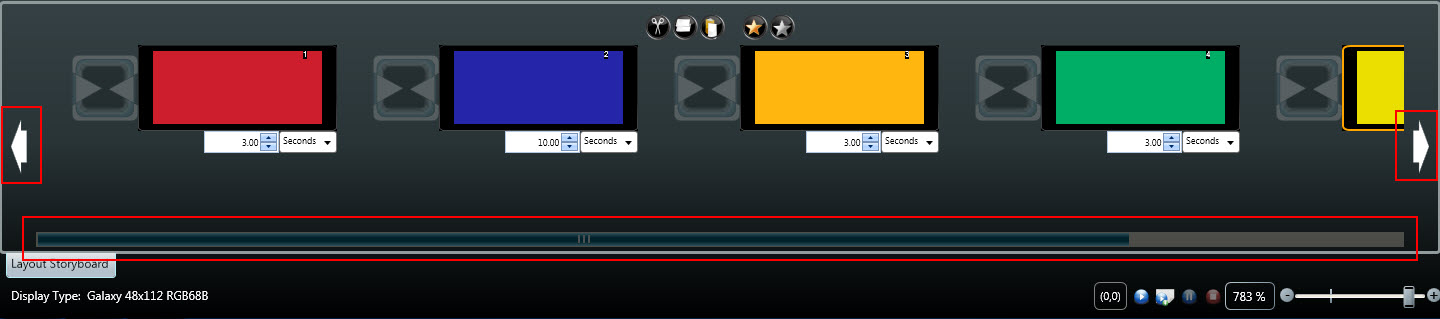
Trainer Tip: If you do happen to have more than one layout in your presentation, you can simply click, drag and drop these miniature layouts to rearrange them and put them in a different order.
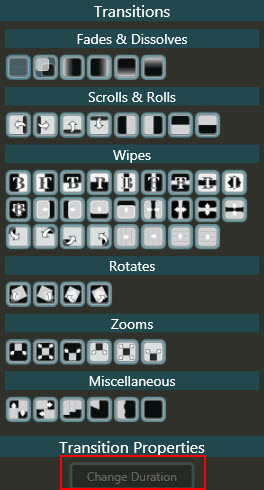
Each layout represented in the Layout Storyboard also has an icon to the left of it that looks like an hourglass. You can click on this hourglass icon to see a list of transitional effects to choose from.
Once you see the list pop up, you can click on any one of the effects to apply it to the selected layout. The selected layout is the layout that you clicked on; it has a gold border around it. You can even adjust the duration of the transition as well!
The hourglass icon isn’t the only place that you can add transitions to the selected layout, though. You can also click on the Layout tab on the ribbon running across the top of Content Studio.

You can even click on the gold star icon in the middle of the Layout Storyboard to choose one transition to apply to every layout in your presentation. So, if you like a certain transition, clicking on the gold star is the quickest and easiest way to have that same transition play before every layout.
You’re probably wondering to yourself what the silver star icon does when you click on it. Well, to answer your question, it will remove all the transitions from your presentation. Simply click on the silver star and every single transition in the current presentation will disappear.
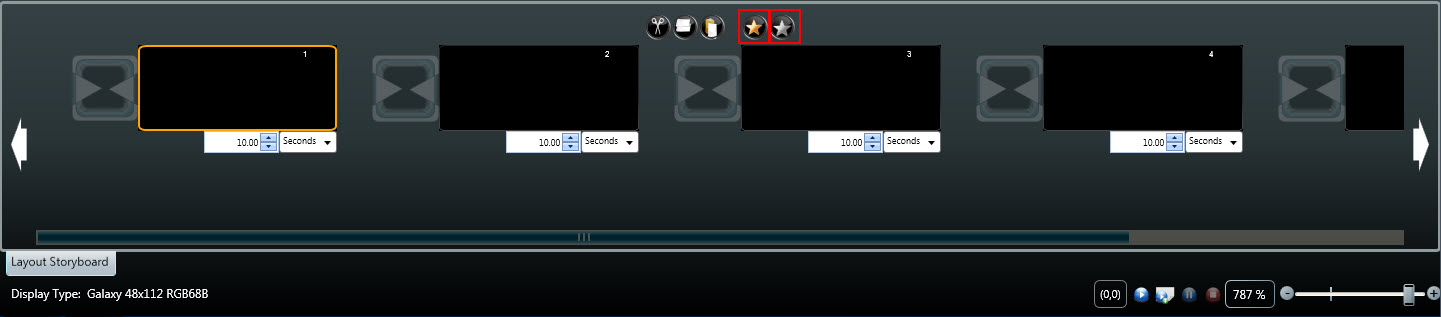
Let’s talk about the other icons in the middle of the Layout Storyboard now. Directly to the left of the star icons are three more icons to choose from. These icons are (from left to right) Cut, Copy, and Paste. In order to use this functionality, you must first click on one of the miniature layouts to select it. Once you see the gold border appear around it, simply click on either Cut or Copy and then choose where you want to Paste within your presentation.
Trainer Tip: Did you know that you can even Cut and Copy in one instance of Content Studio and then paste into an entirely different session of Content Studio? How cool is that? This is quite helpful if you have multiple displays that are different sizes and want to play the same content on all of them. Click on the link below for step-by-step instructions if you’re interested.
You can also use your keyboard shortcuts to Cut, Copy, and Paste as well. Simply click on Ctrl+C to Copy and Ctrl+V to Paste, or Ctrl+X to Cut and Ctrl+V to Paste.
Right-clicking on the miniature layouts also gives you the options to Cut, Copy, and Paste, as well as the ability to add a new layout or insert a new layout to your presentation, or delete the selected layout from your presentation.
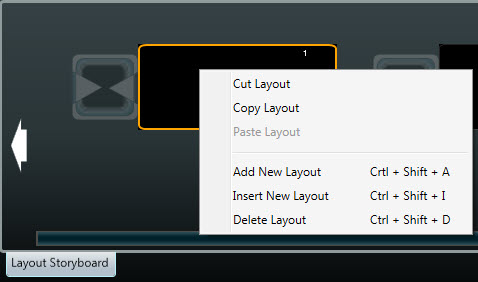
You can also find the options to Add, Insert, or Delete layouts in the ribbon bar running across the top of Content Studio in the Home Tab.

Adding a layout will place a new layout to the end of your presentation. Inserting a layout will insert a layout in front of the selected layout, and deleting a layout will remove the layout from your presentation entirely.
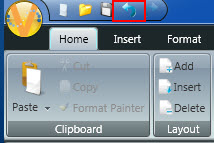
Don’t worry, though! If you click delete layout by accident, there is an undo arrow button in the upper left corner of Content Studio that you can click on to reverse the damage!
Speaking of arrows, you more than likely noticed the white arrows on either side of the Layout Storyboard. If you have several layouts in your presentation, you can click on these arrows to scroll through your presentation and see all of them. You can also click and drag the scroll bar at the bottom.
Now, if you absolutely prefer using the Timeline Tab over the Layout Storyboard, that is perfectly fine, but I just want to show you what changes when you enable the Timeline first.
When the Layout Storyboard is being used before the Timeline is enabled, you can adjust the duration of each individual layout by entering in the duration in the field below each layout or using the arrows and seconds/minutes/hours drop-down menu.

Once you have enabled the Timeline, that option goes away, so you will no longer be able to adjust the duration of each layout within the Layout Storyboard. Instead, you will use the Timeline to adjust the duration of each element, including the layouts themselves.

All right, now that you know all about the Layout Storyboard, we’re going to show you how to disable the Timeline Tab just in case you want to simplify things!
Remember, by doing this you will only be able to adjust the duration of your layouts as a whole, not any of the elements (text boxes, images/stills, videos/animations) within them.
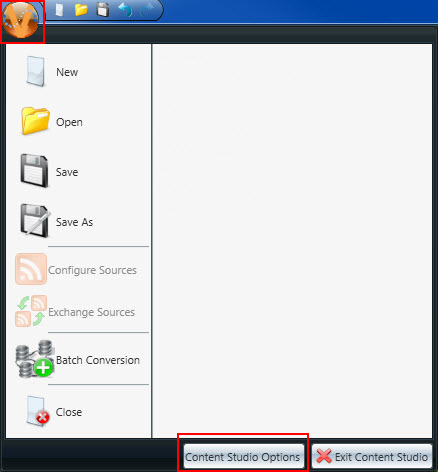
- Click on the Application Menu (Orange V) in the upper left corner.
- Click on Content Studio Options.
![Application Menu]()
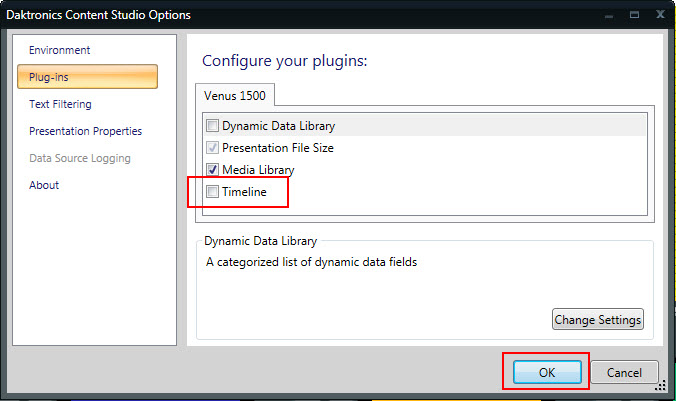
- Click on Plug-Ins.
- Uncheck Timeline.
- Click OK.
![DIsable Timeline]()
That’s all there is to it! We hope you found this post helpful.
Be sure to click on the orange “Receive Email Updates” button on the right side of the page to subscribe.
Thanks for reading!