
Opt-In to the Redesigned Playlist Editor!
You may have noticed a new banner message in your Playlist tab recently. There’s a good reason for that. We updated how you create playlists! These updates are based on customer feedback and overall user experience. That’s a fancy way of saying that we updated the software to make it friendlier and easier for you! […]
Daktronics Commercial Software Training on 7/19/2017
Categories: Venus Control Suite Training
You may have noticed a new banner message in your Playlist tab recently. There’s a good reason for that. We updated how you create playlists!
These updates are based on customer feedback and overall user experience. That’s a fancy way of saying that we updated the software to make it friendlier and easier for you!
The improved user-friendliness of this update comes in the form of less clicks! This means you can create your playlists faster . . . quicker . . . more efficiently!!! The new layout also makes creating playlists on your mobile devices (smart phones, tablets) easier than ever!
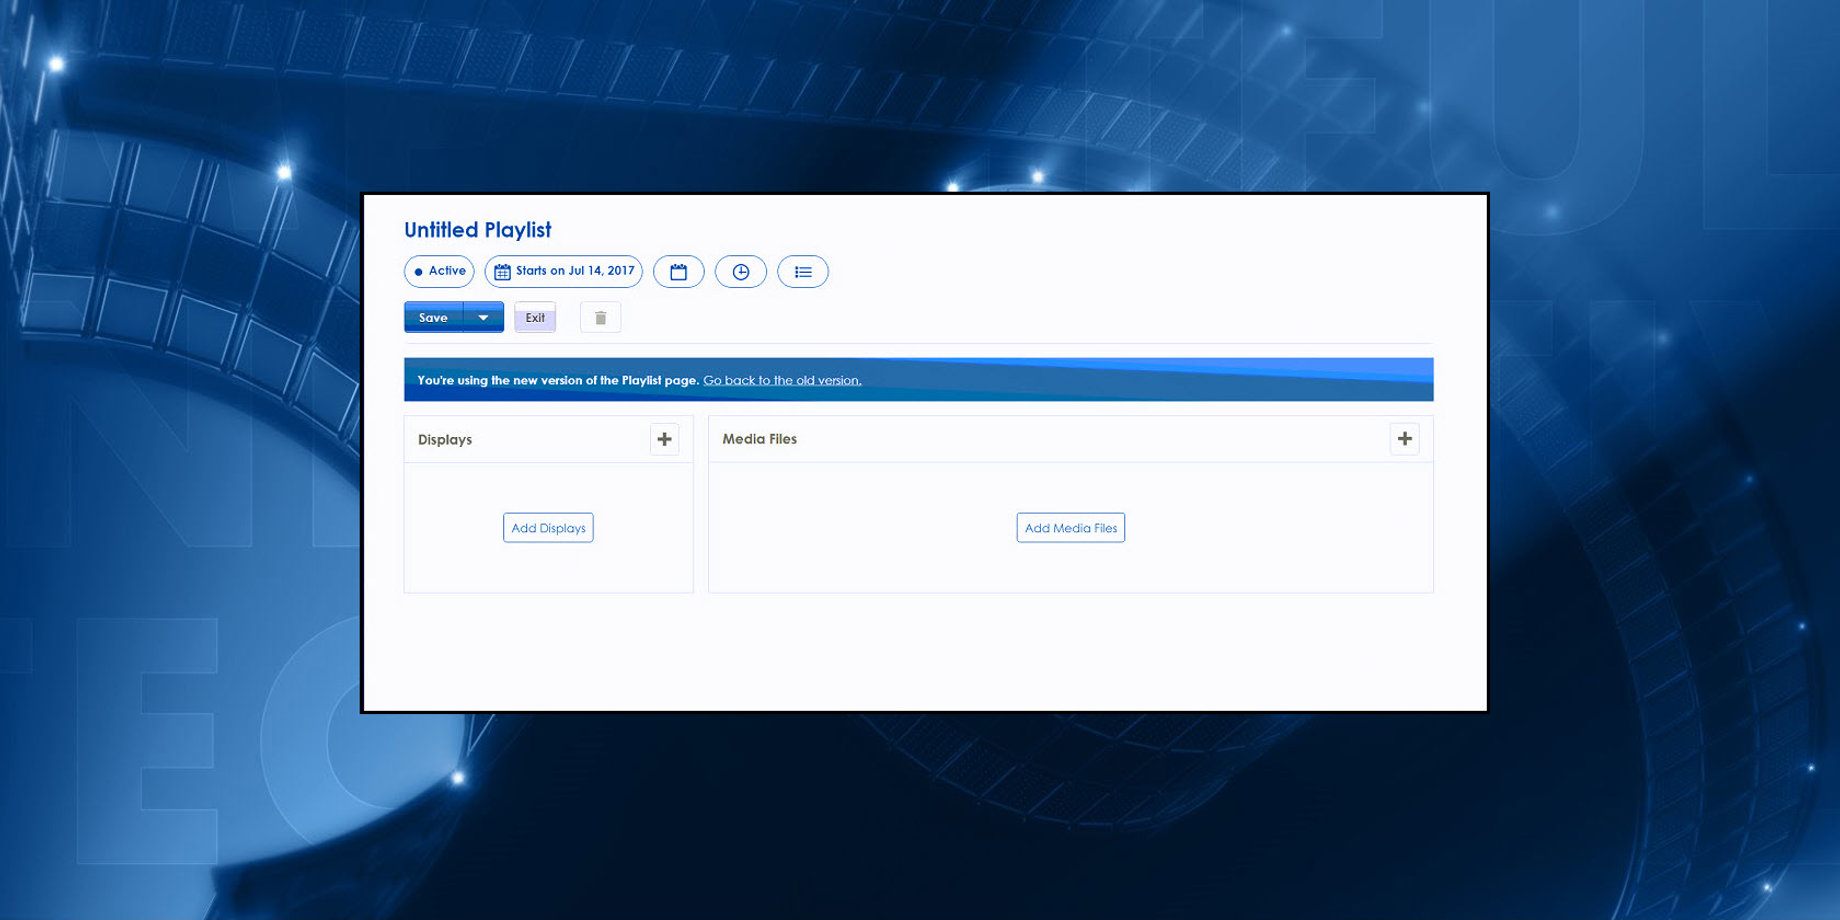
Playlist Editors
Clicking on your Playlists tab in the Main Menu takes you to your existing playlists, just as before. However, when you click the Add New button to create a new playlist, you will see a blue banner at the top of the screen above your Playlist Details and Playlist Files.
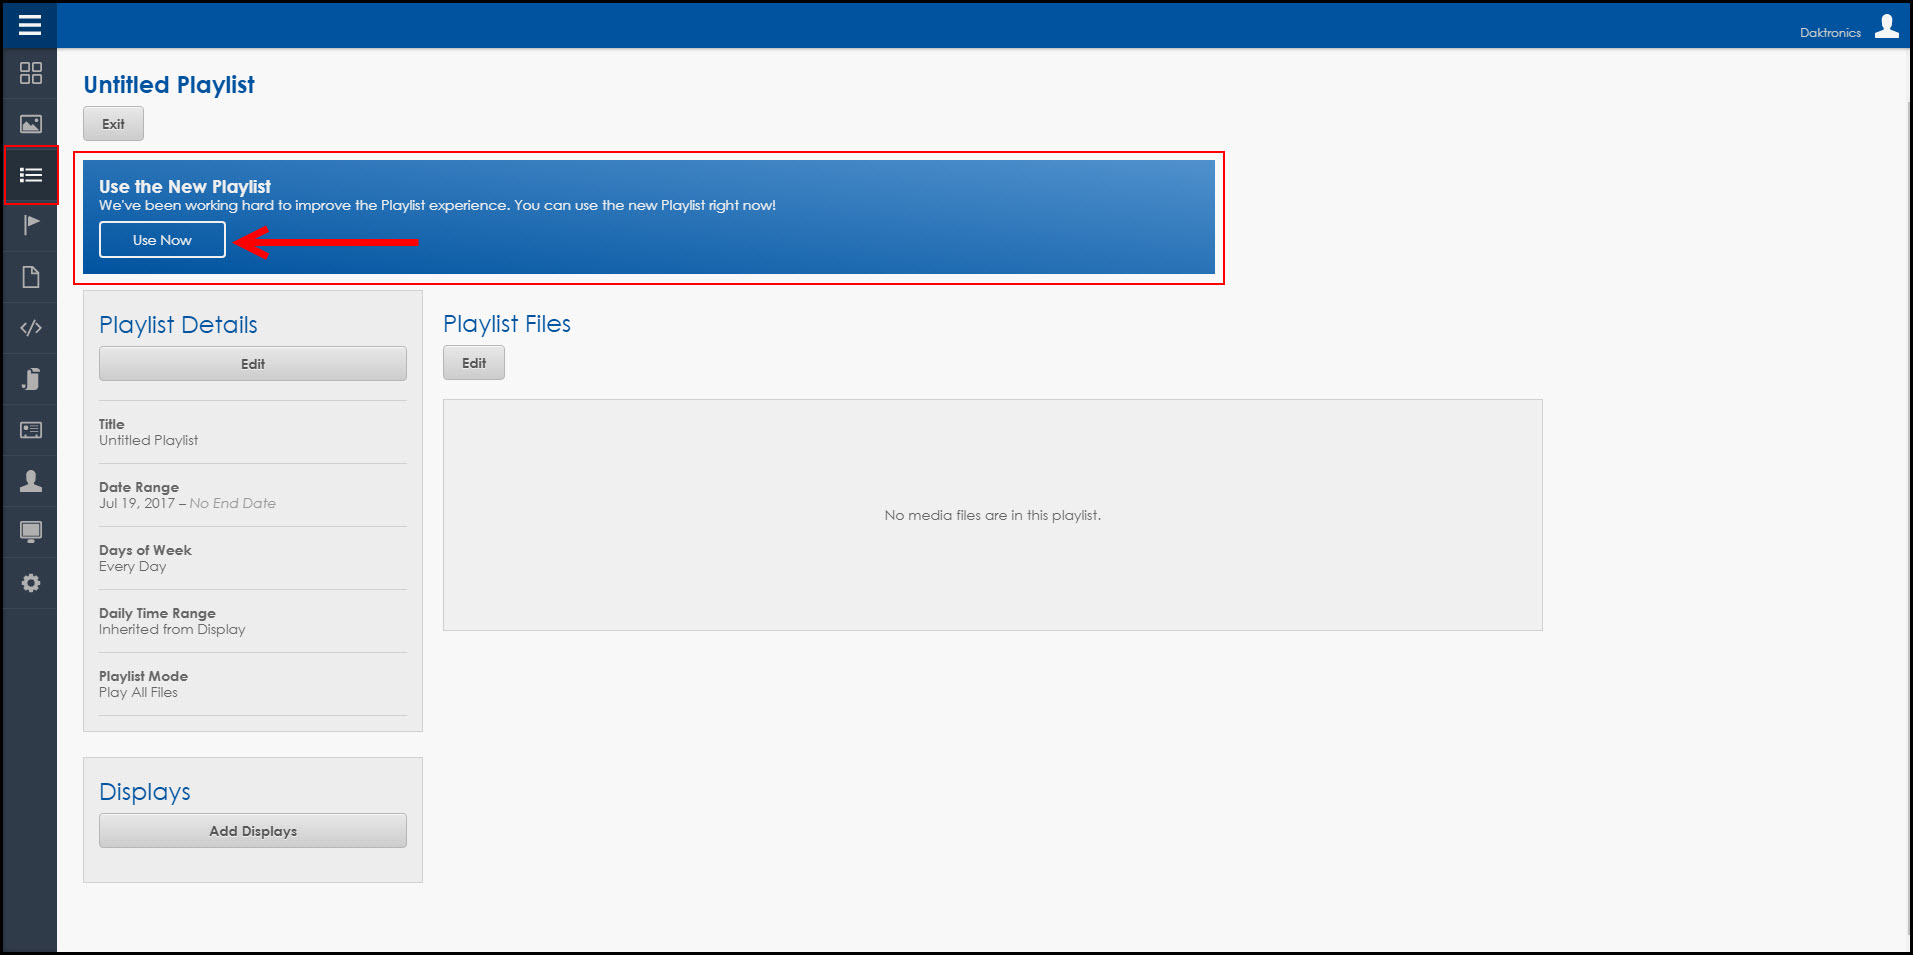
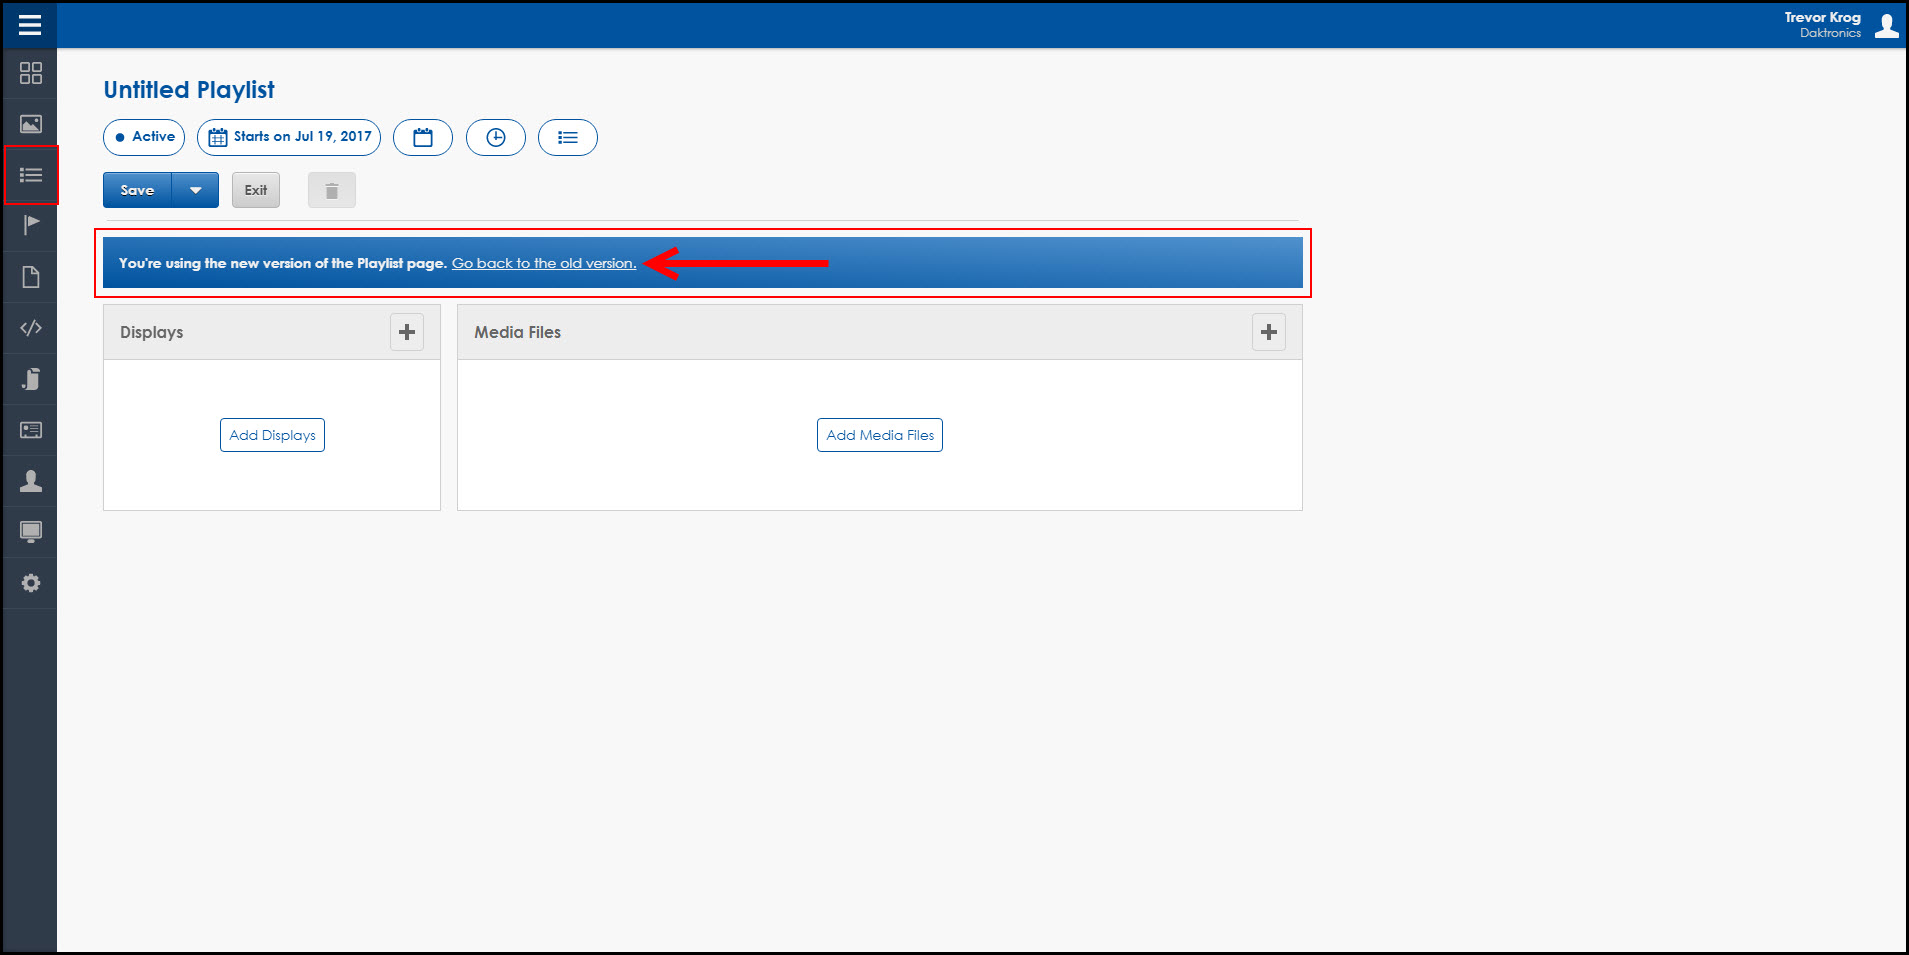
You can click on Use Now within the blue banner to access the New Playlist Editor. Once you do that, the view of your playlist changes to the new layout. You will also notice a message at the top of that screen above your Displays and Media Files. This message has a link you can click on to return to the old Playlist editor.
Try it, you’ll like it!
Once you decide to give it a chance and opt-in to the brand-new Playlist editor, your view will obviously be different than before. Together, let’s walk through how to create a playlist.
- Log into Venus Control Suite.
- Click on Playlists in the Main Menu.
- Click on the blue Add New button to create a new playlist.
![PLaylists]()
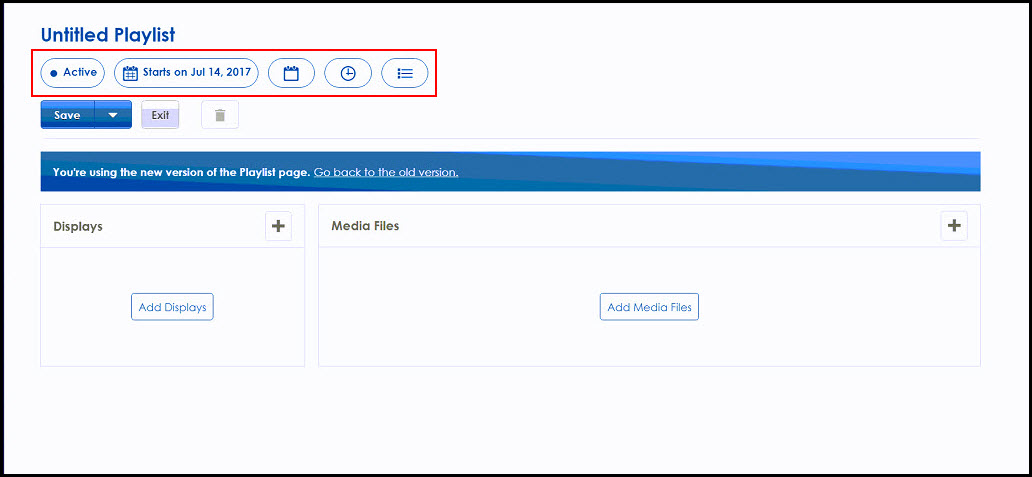
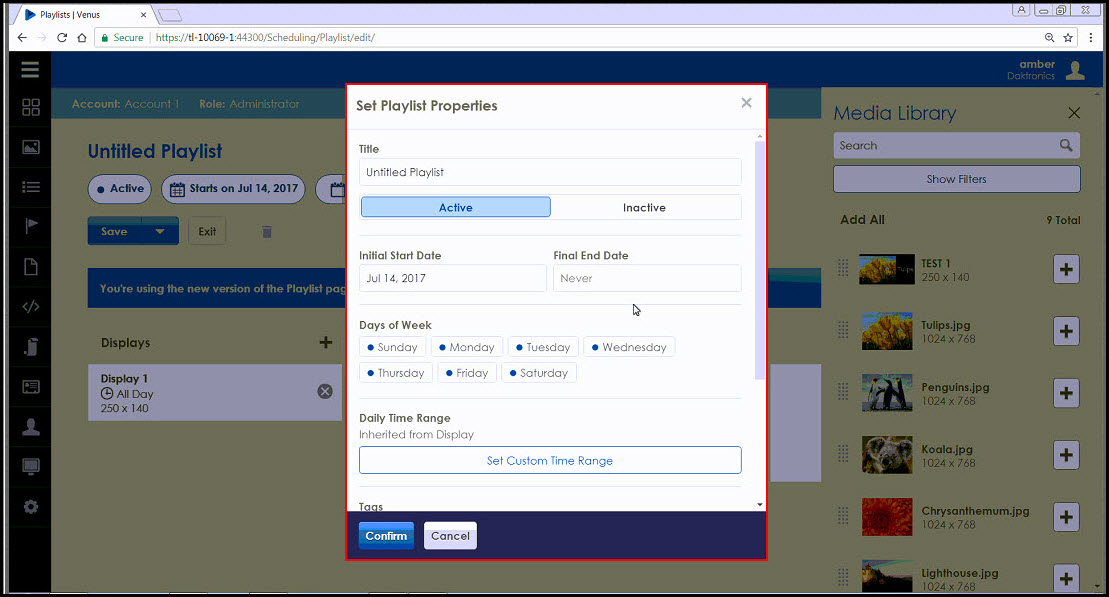
- At the top of the screen, click on any of the Playlist Properties to open the Properties window.
![Playlist Configuration]()
- Configure your Playlist and click Confirm.
![Playlist Properties]()
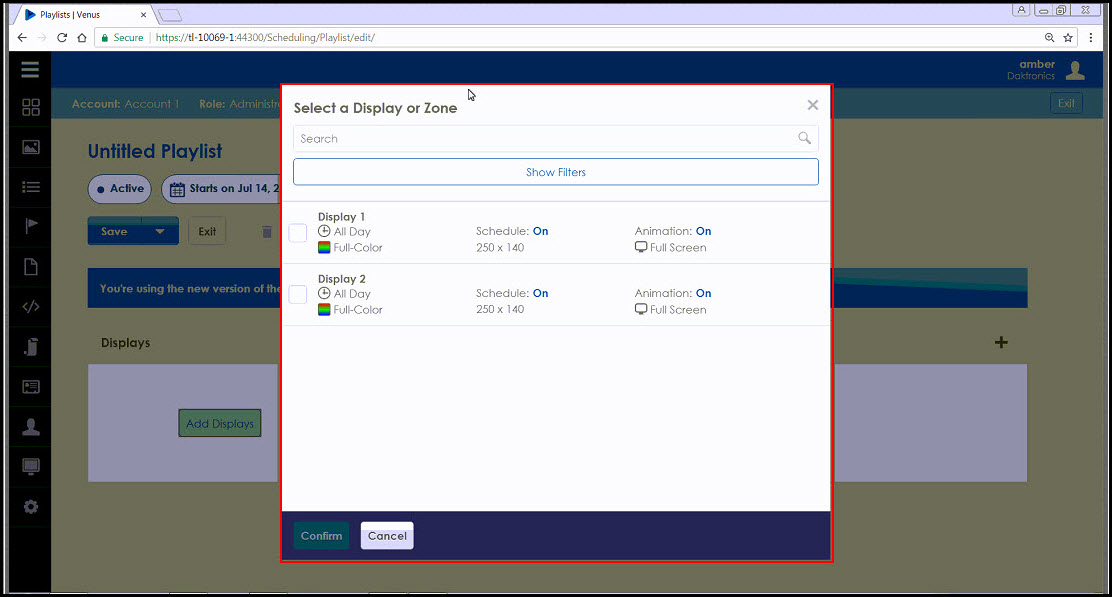
- Click Add Displays, and select the display(s) that this playlist will play on.
![Select a Display]()
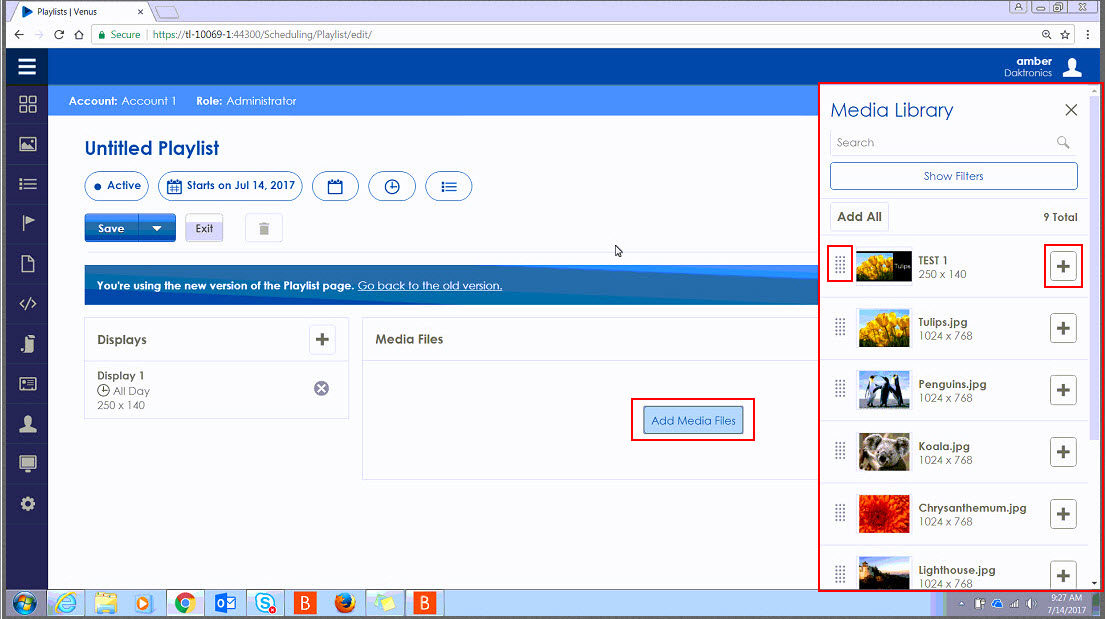
- Click Add Media Files to push open your Media Library Shelf on the right side of the screen.
- Select the media files you want to add to your playlist by clicking and dragging, clicking the + button, or clicking Add All.
![Add Media Files]()
- Apply custom constraints by clicking on the Media Files thumbnails.
- Click Save.

Voilà! You just published a playlist out to your display using the all-new Playlist editor! Wasn’t that easy?!
Saving & Publishing
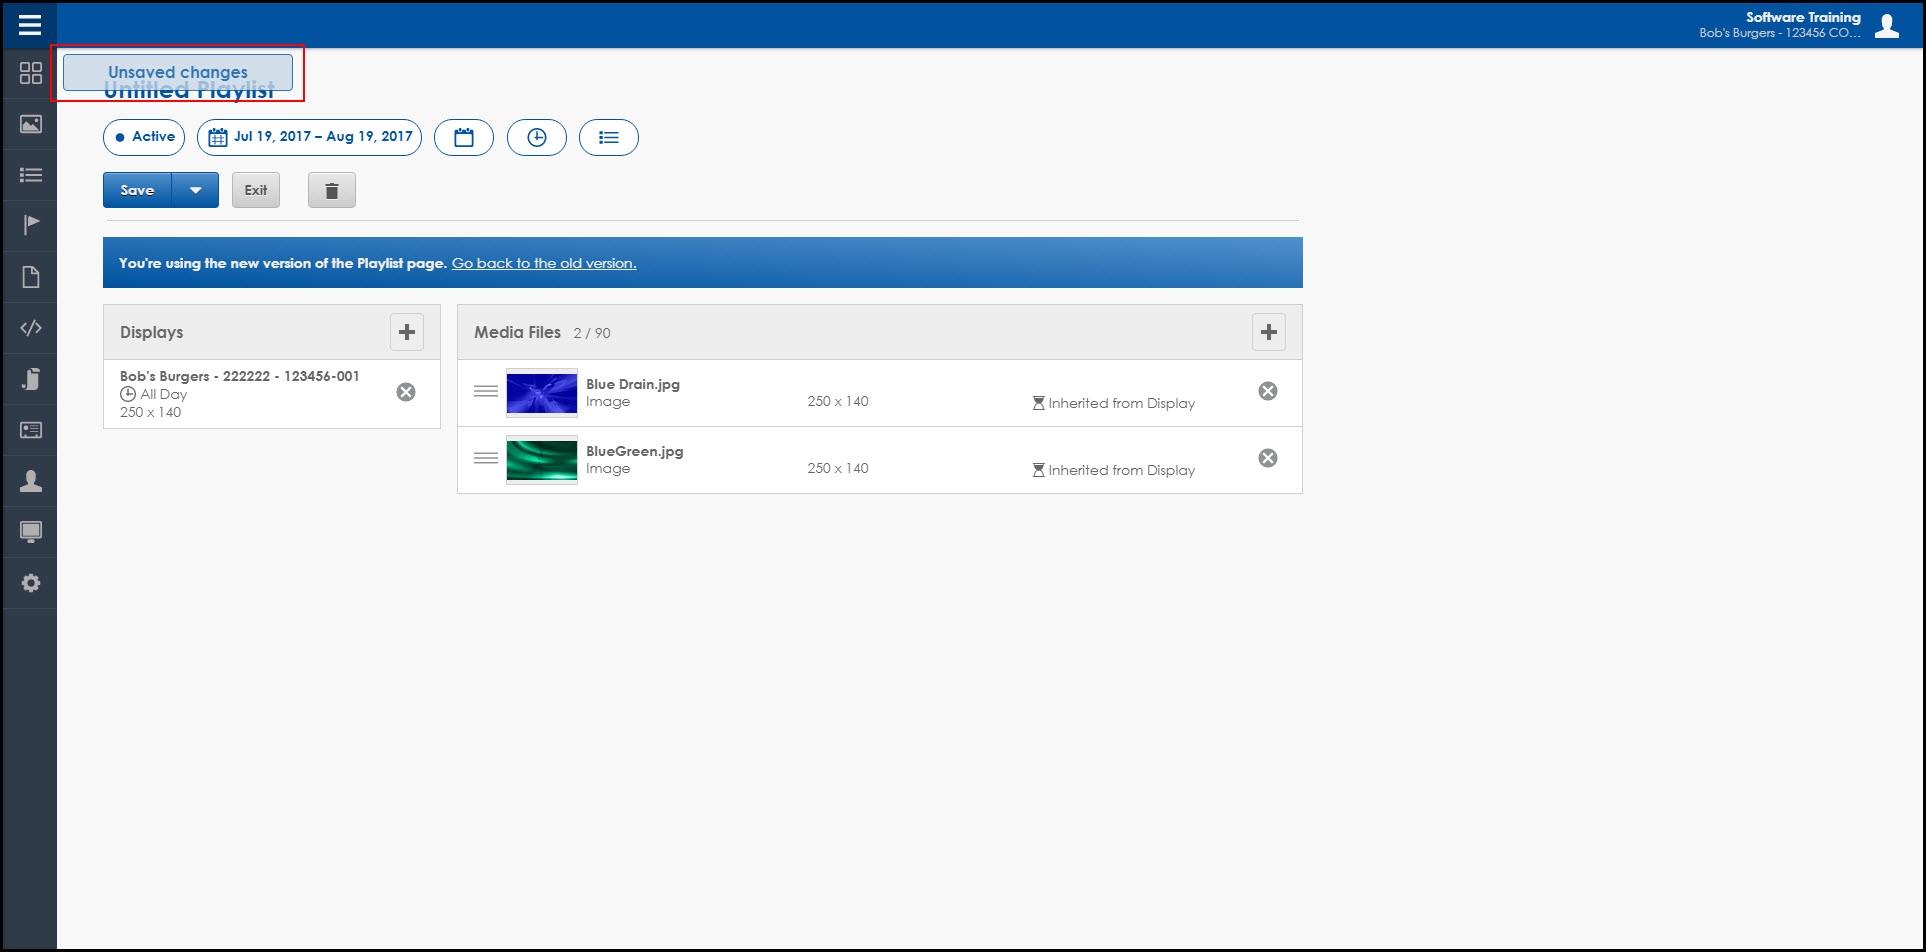
A great feature in the redesigned Playlist editor is the ability to edit existing playlists without worrying. No changes will go out to your display until you click Save!
So, what if you are adding files from your Media Library into your playlist? And then you add custom constraints to those files because you want them to start playing at a later date/time? You can rest assured that they will not start playing until you want them to, since you must Save the playlist first!
You can even choose Save As when saving your playlist, so you don’t lose progress. Let’s say you are working on a playlist one afternoon, but get called into a meeting unexpectedly …
… rather than having to choose between Publishing the unfinished playlist to your display or closing out of the playlist and losing all your progress, you can just click Save As and come back to finish later!

You will also have the ability to choose whether or not your Playlist is Active. This means that you can decide which playlists will play on your display and which will not.
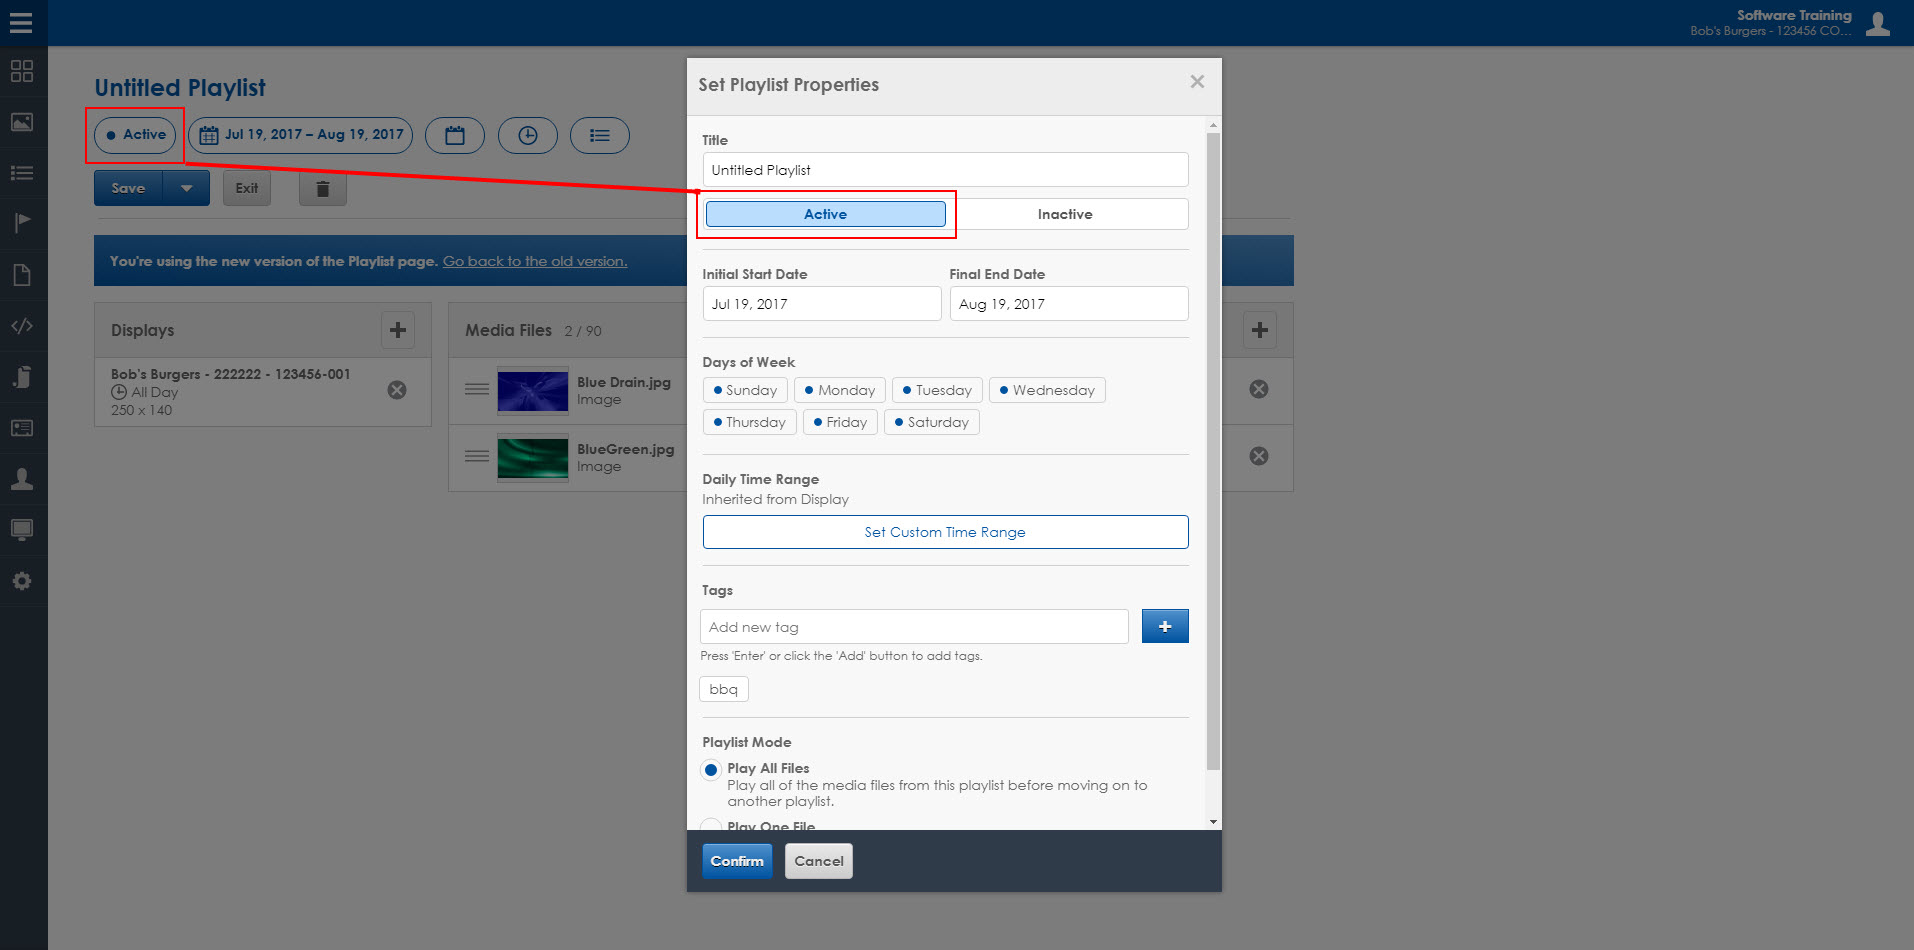
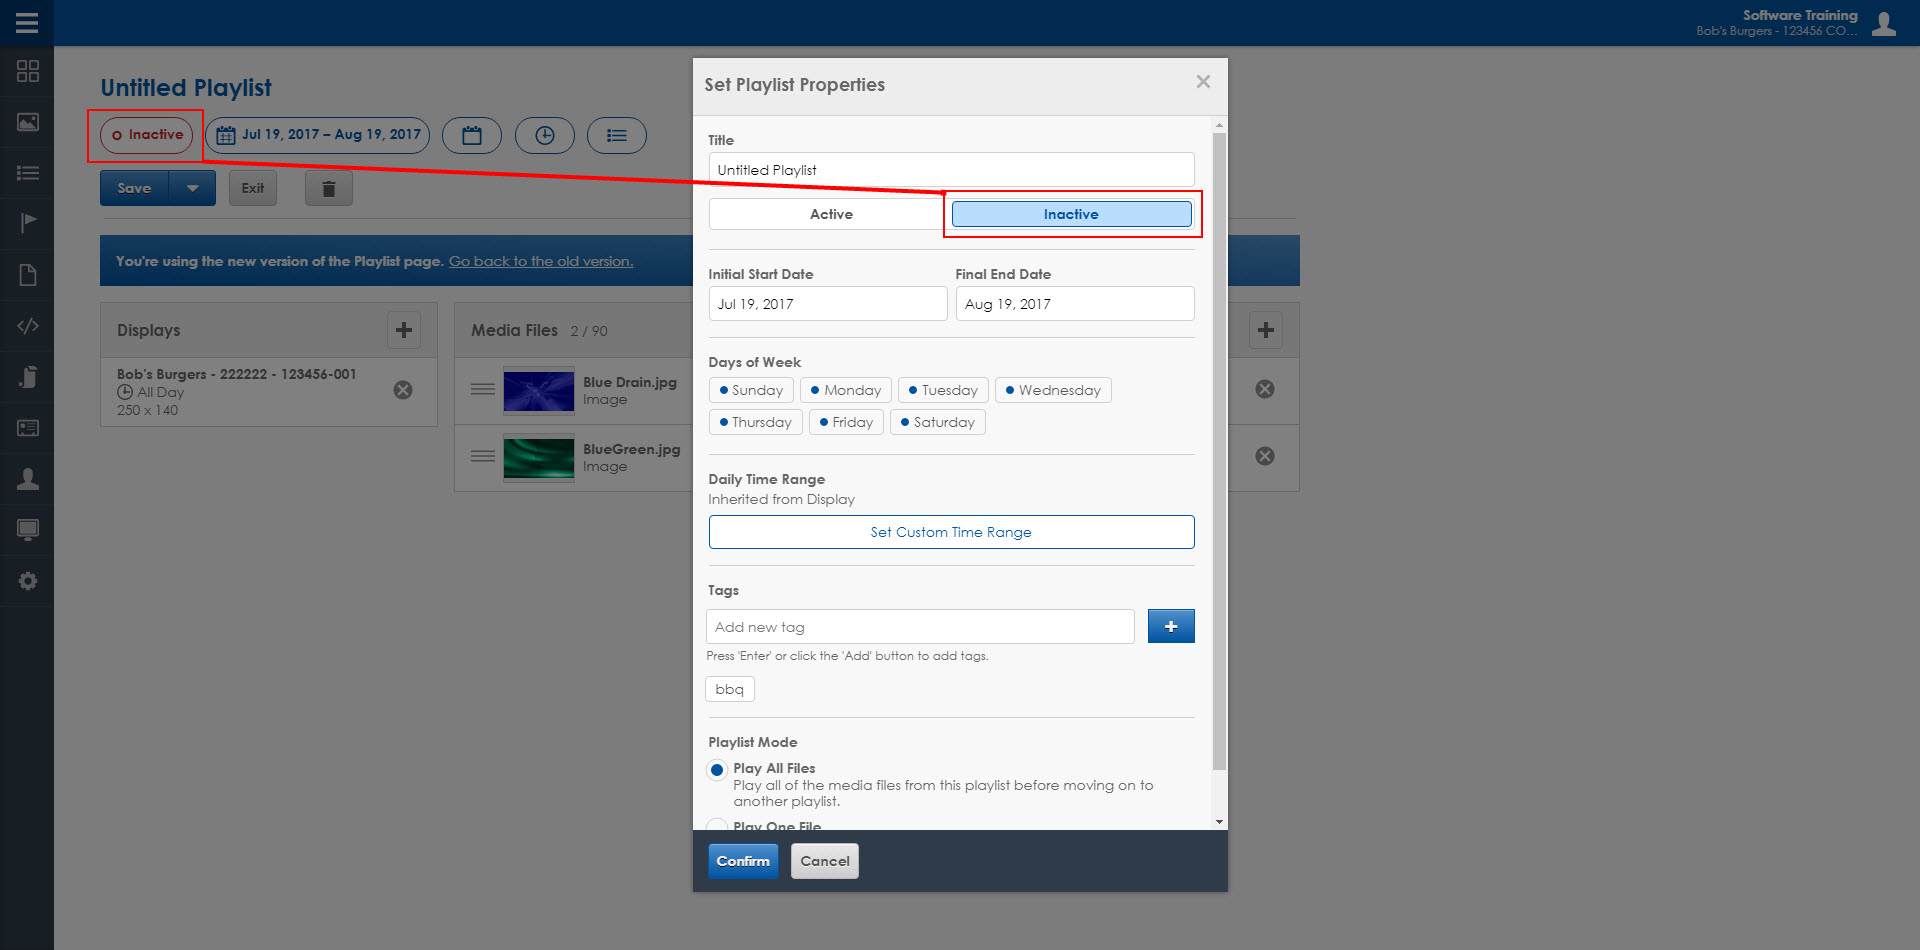
You may want to set a playlist to Inactive status if you don’t want it to play right now, but want it to play again in the future. This is really a nice feature, allowing you to save time without recreating playlists!
Trainer Tip: Another great new feature is that whenever you do make changes to an existing playlist, a message appears in the upper left corner saying “Unsaved Changes,” reminding you that you still need to Save!
With these great new features in the redesigned Playlist Editor, creating and managing your playlists has never been easier!
We encourage you to opt-in and try it out today! Having reservations? Just watch the video to see how truly quick and easy it is to create a playlist.
Be sure to click on the orange “Receive Email Updates” button on the right side of the page to subscribe to our blog.
Thanks for reading!