
Updates Made for Ad Grid Users
Learn all about the latest updates made to Venus Control Suite, including Content Approval and Group Sales.
Daktronics Commercial Software Training on 4/27/2018
Categories: Venus Control Suite Training
For those of you who use billboards to sell time to 3rd party advertisers, we have some great news! Two very helpful updates have been made to the Venus Control Suite software to make your lives easier. These updates were based on feedback that you provided to us, so if you have any more ideas, be sure to let us know!
Media Approval
Display owners now have the option to enable media approval for advertisers who upload and schedule their own media. Read the following directions to find out how you can take advantage of this new feature.
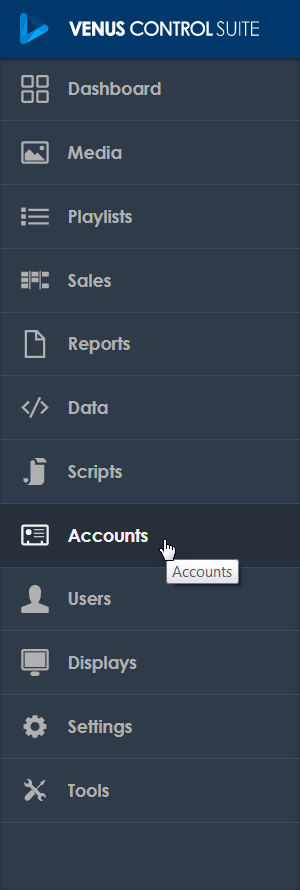
- If you want to require content approval for an advertiser, first you will need to click on Accounts in the Main Menu.
![Accounts]()
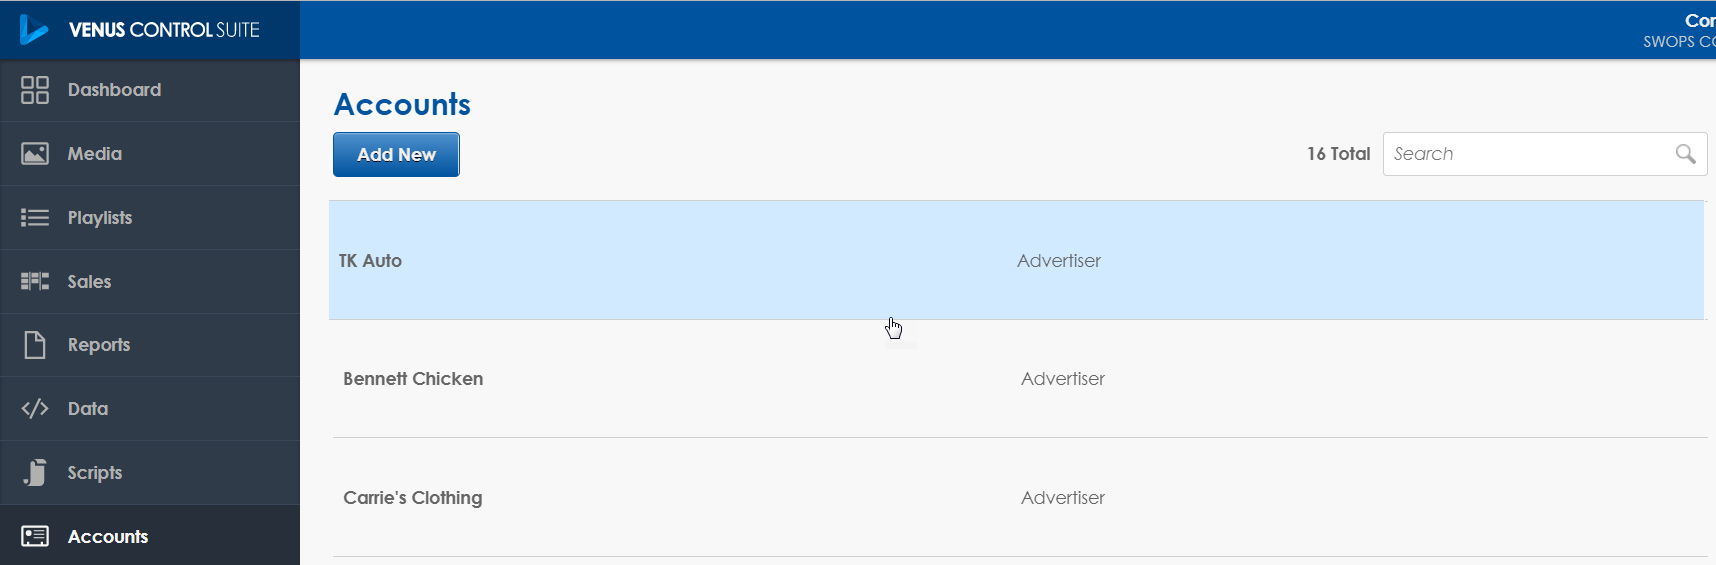
- Then either click on Add New to create a new account or click on an existing Advertiser account from the list.
![Choose Account]()
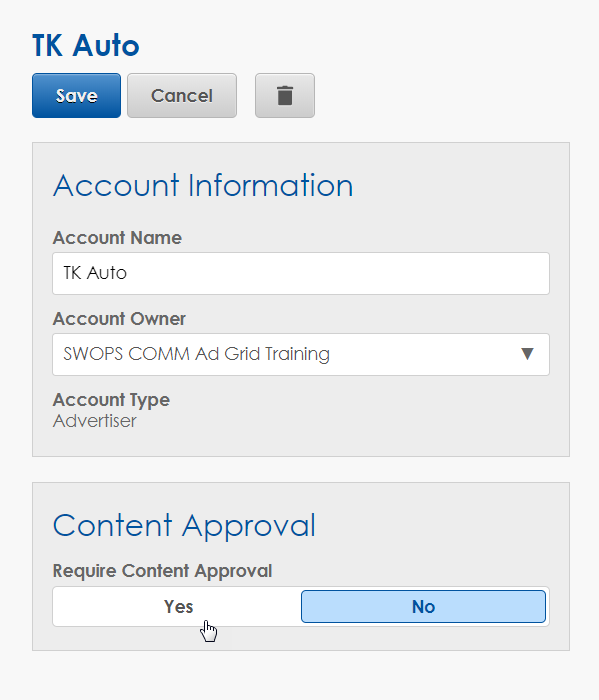
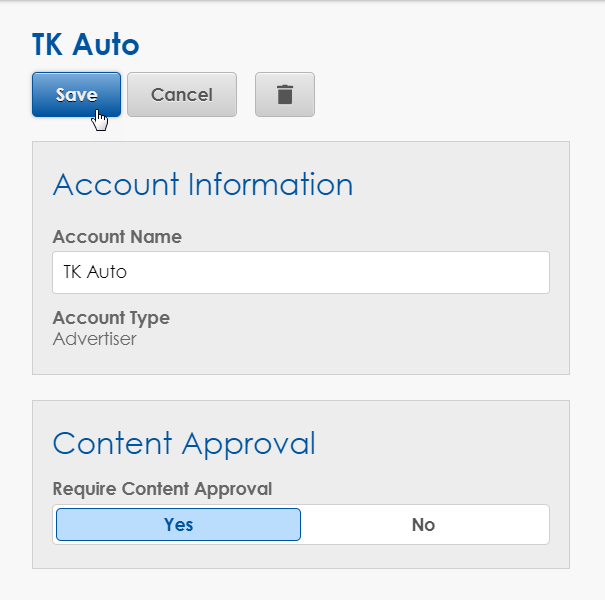
- Under Content Approval click Yes. The default setting is No, so you will have to do this for each advertiser account that requires approval.
![Content Approval No]()
- Click the blue Save button.
![Save]()
Henceforth, when your advertiser logs into their Venus Control Suite account, they will see a new button in their Media Library with an envelope icon on it. They will go through the following steps to request media approval from you.
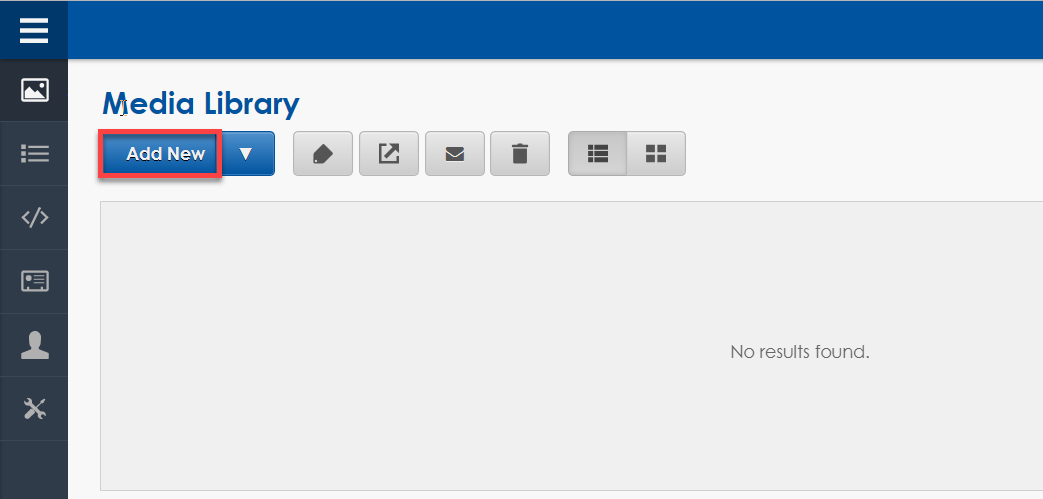
- Click on the blue Add New button in their Media Library to upload the content.
![Upload]()
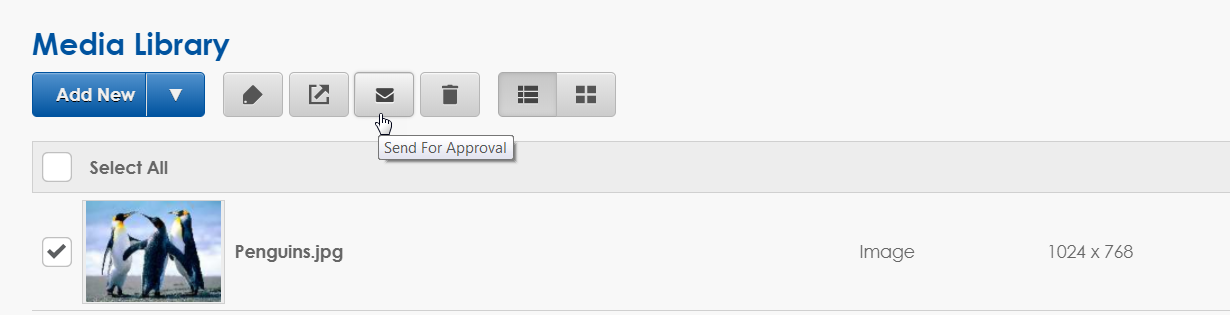
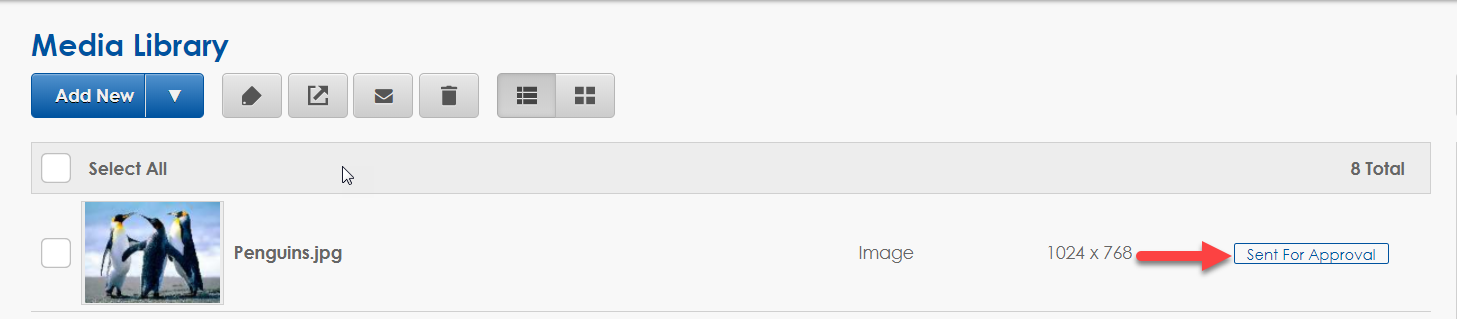
- Put a checkmark next to the file(s) they need approval for and click the new envelope button to Send For Approval.
![Envelope]()
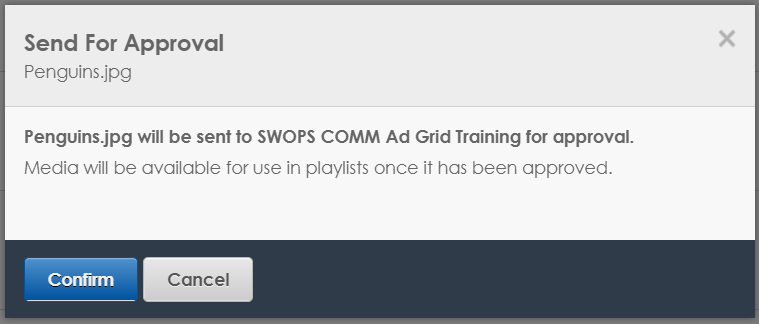
- Click the blue Confirm button to Send For Approval. Media will be available for use in playlists once it has been approved.
![Send For Approval]()
- A Sent For Approval notification will appear next to the thumbnail in their Media Library.
![Sent For Approval]()
From there, your advertiser will have to wait to get your approval until they can schedule the content. They can create the playlist while they wait, but the media will not actually play on any display(s) until it has been approved. Keep reading to find out how you can approve their content.
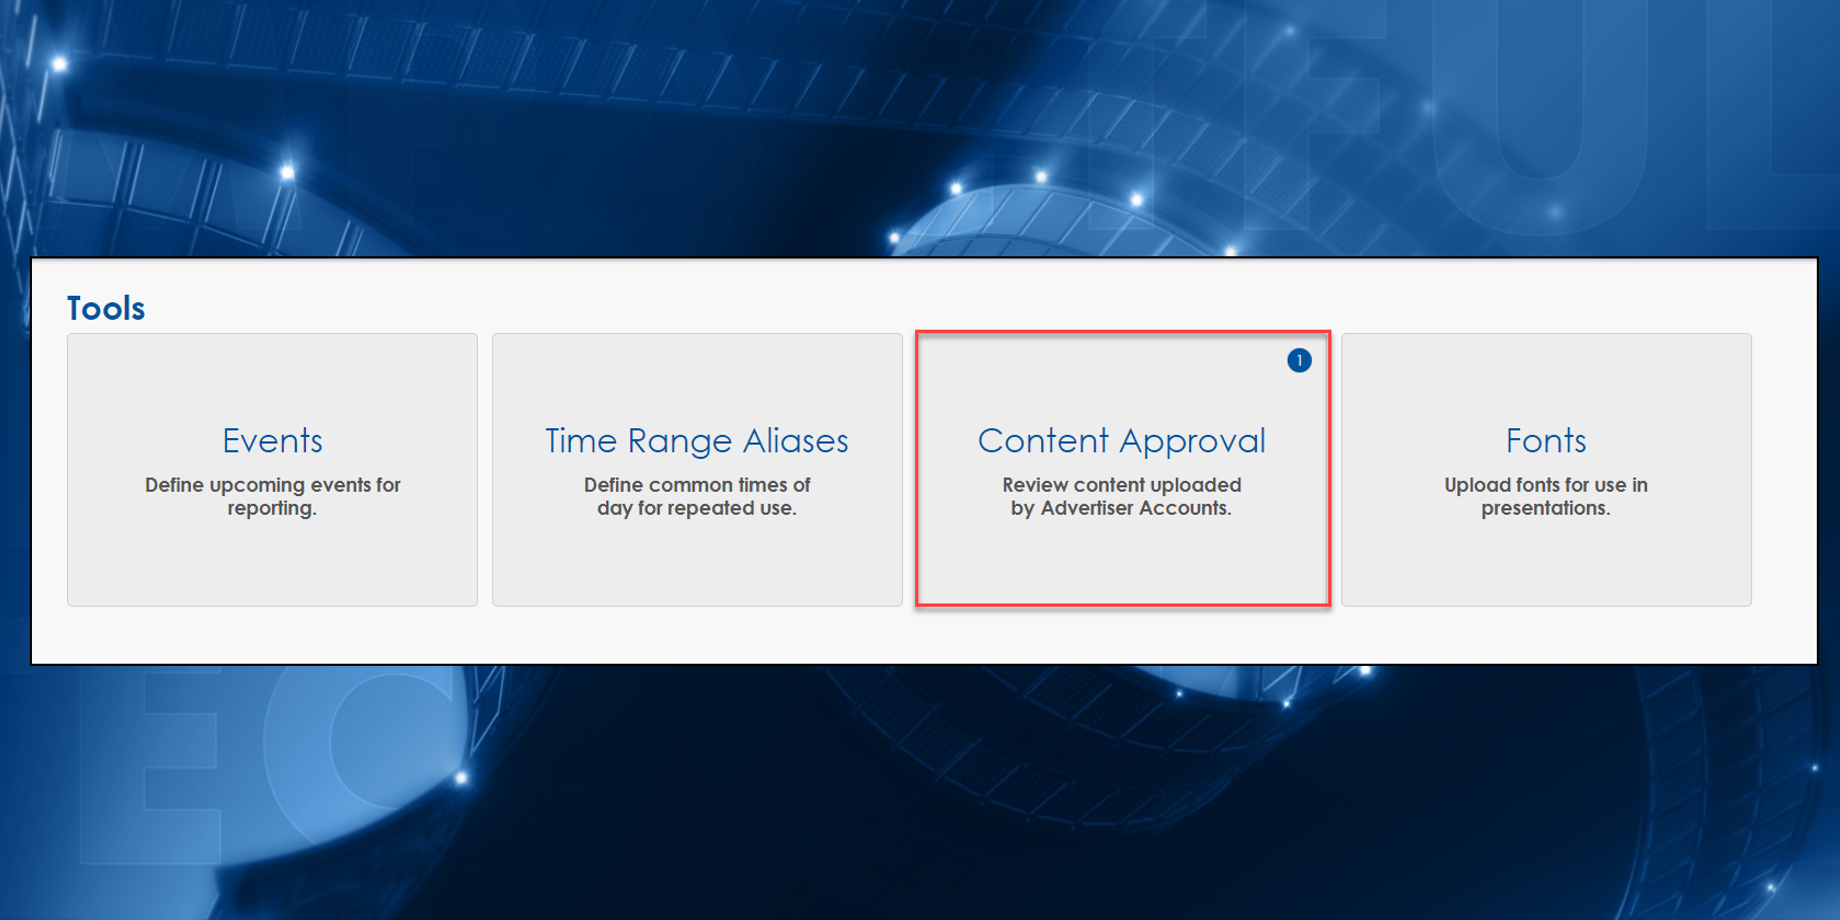
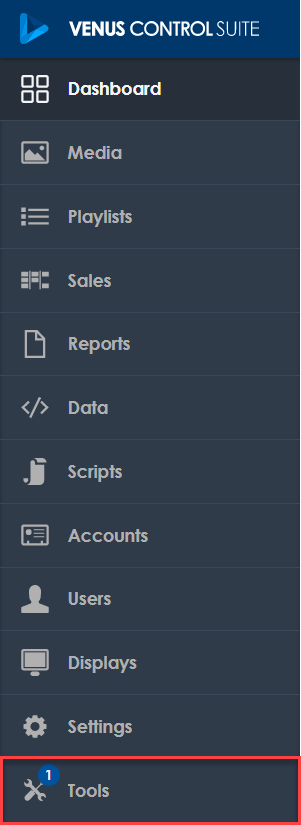
- Once your advertiser has requested approval, you will see a notification pop up on Tools in the Main Menu. Click on Tools in the Main Menu.
![Tools Tab 2]()
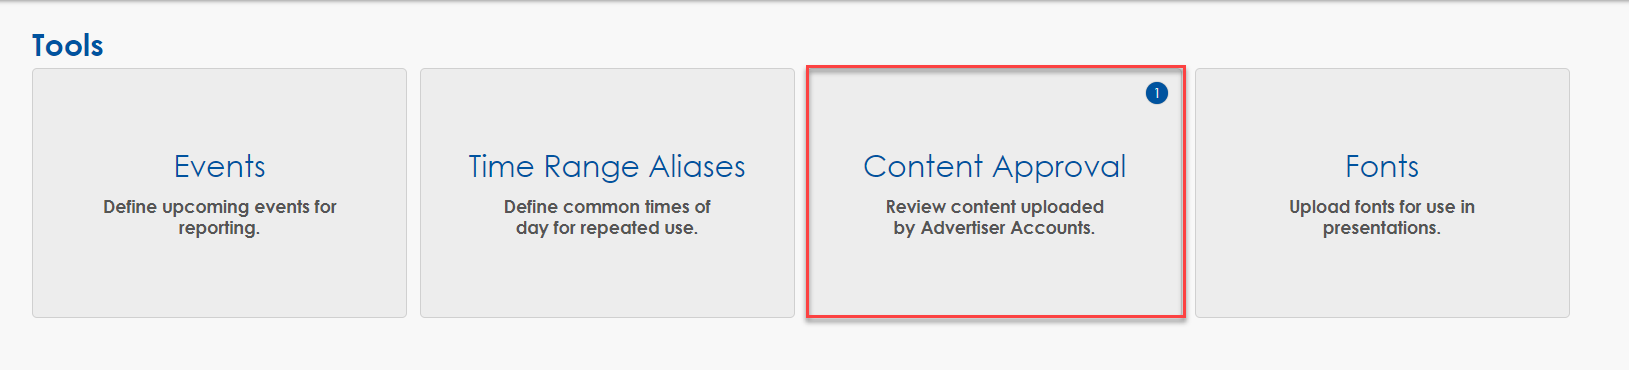
- You will see a new Content Approval button that you can click on. Go ahead and click on it to the Content Approval page.
![Click on Content Approval]()
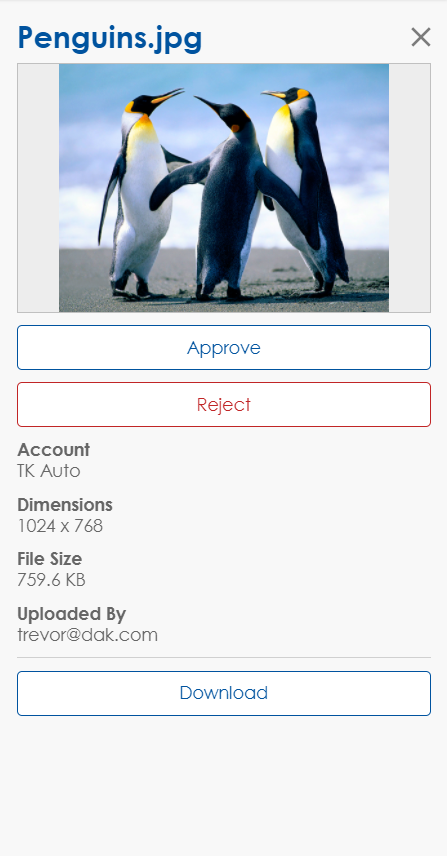
- Checkmark the file(s) and then click the Thumbs Up button to approve or the Thumbs Down button to reject.
![thumbs up]()
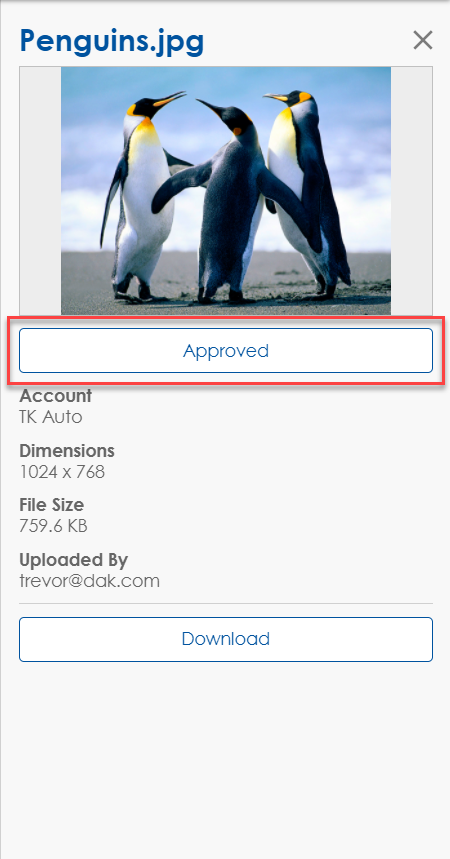
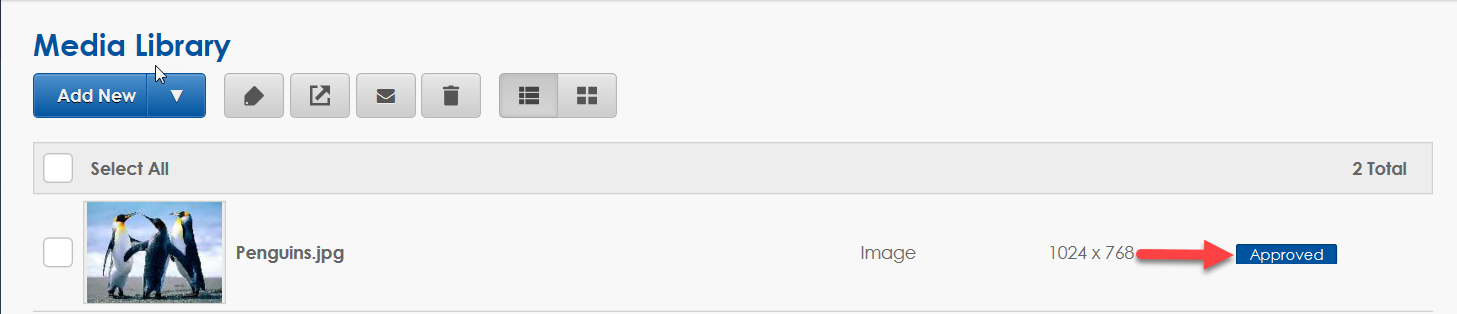
You can also click on the thumbnail of an individual file to Approve, Reject or Download. This is helpful because it also shows you the file size and who uploaded the file.
![Penguins]()
- If you approve the content, then you will see a blue Approved notification next to the thumbnail in your Content Approval page.
![Content Approved]()
You will see the same notification if you click on the thumbnail to view the individual file.
![Penguins approved]()
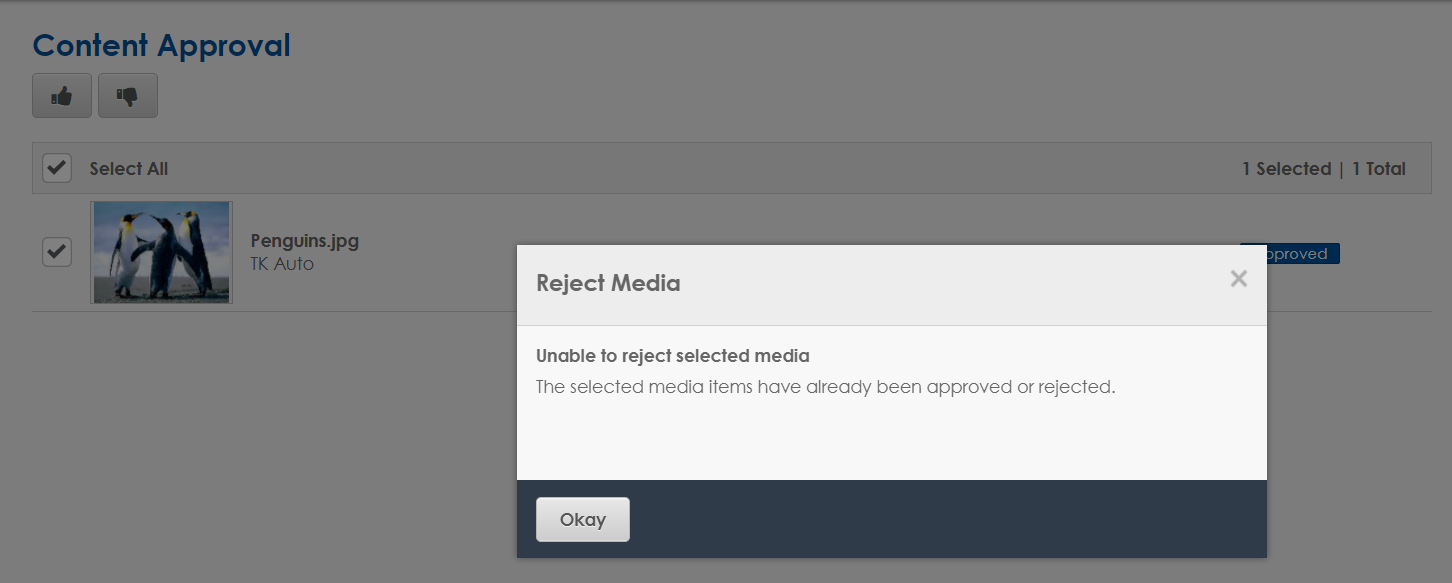
Once you approve content, you cannot reject it thereafter. If you try to, you will get a dialog window saying Unable to reject selected media.
![Unable to reject]()
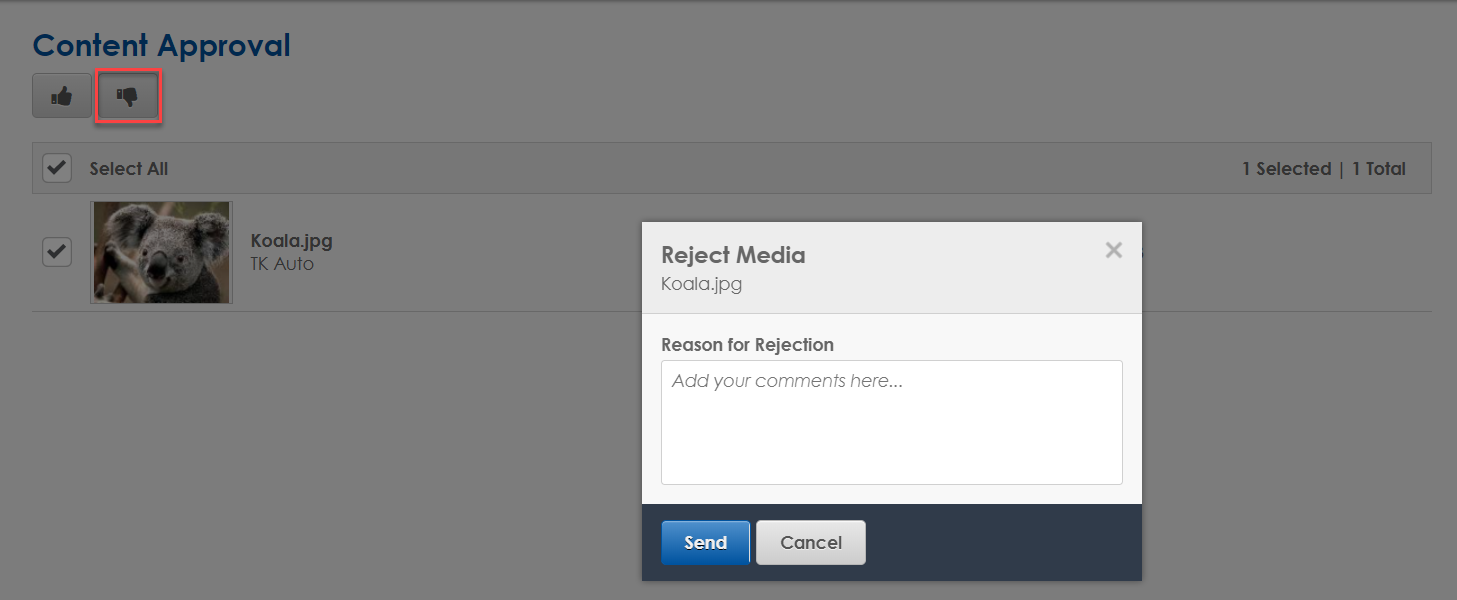
- If you reject the content, then you will need to provide a Reason for rejection.
![Reject media]()
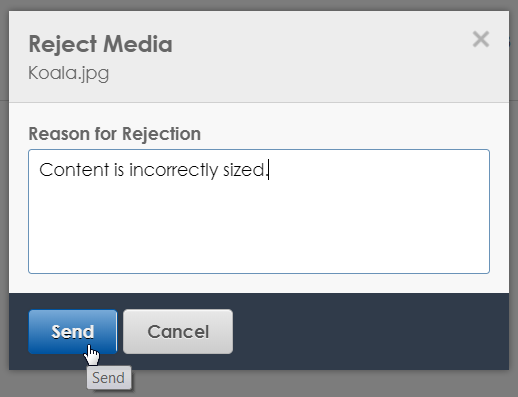
Go ahead and type in your explanation where it says, “Add your comments here …” and click the blue Send button.
![Comments]()
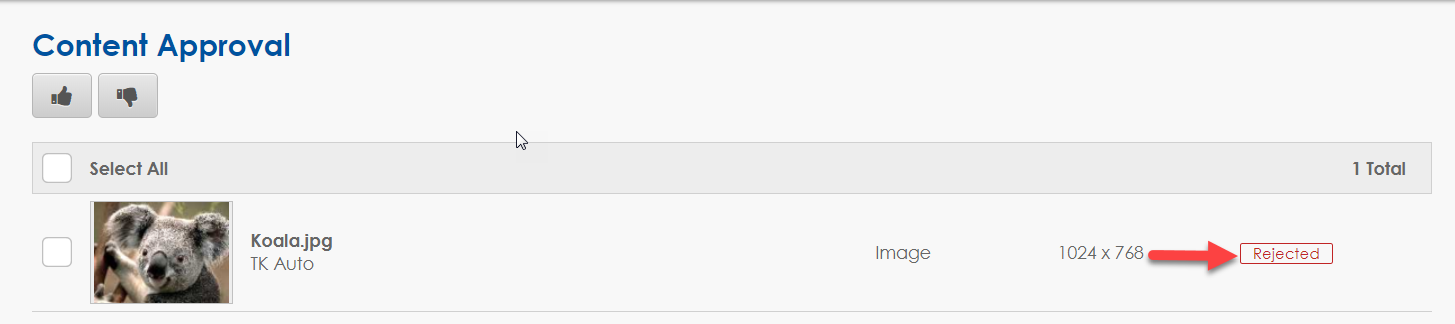
You will now see a red Rejected notification next to the thumbnail.
![rejected notification]()
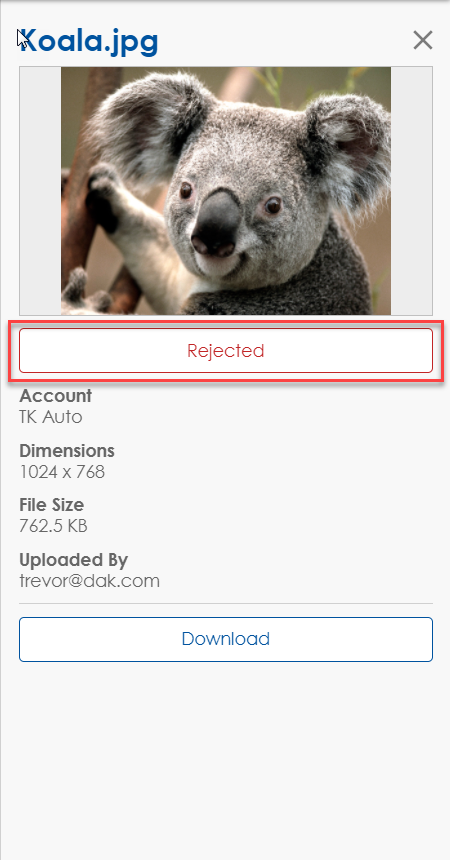
You will see the same notification if you click on the thumbnail to view the individual file.
![rejected koala]()
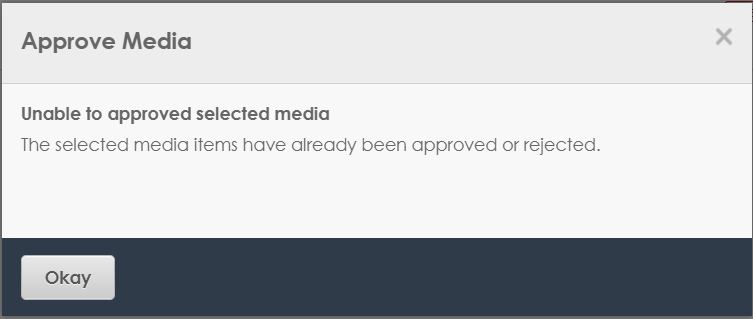
Once you reject content, you cannot approve it thereafter. If you try, you will get a dialog window saying Unable to approve selected media.
![Unable to approve]()


Now that you have done your part, the advertiser will be able to find out if their content has been approved or rejected by reviewing the approval notifications in their Media Library.
- If you approved the content, they will see a blue Approved notification next to the thumbnail in their Media Library.
![Approved for advertiser use]()
They can also click on the thumbnail in their Media Library to open the larger preview window, allowing them to scroll down and see who provided approval. Once the content is approved, they will be able to schedule their content accordingly.
![Approved thumbnail]()
- If you rejected the content, they will see a red Rejected notification next to the thumbnail in their Media Library.
![rejected notification]()
From here, they will need to click on the thumbnail in their Media Library that opens a larger preview window. Then they will have to scroll down to review the comment you left explaining why you rejected the file. Now, they can make the necessary modifications to correct the problem.
![Rejected thumbnail]()


Trainer Tip: Once content (images and videos) has been rejected it cannot be sent for re-approval. It has to be deleted and re-uploaded. Web Presentations can be edited and resent for approval after being rejected however.
Group Sales
Display owners can now select multiple displays to add a sale to simultaneously. This should save you quite a bit of time if you have multiple displays that you are selling time to for the same advertiser. Read the following directions to find out how you can take advantage of this new feature as well.
- Click on Sales in the Main Menu.
![Sales]()
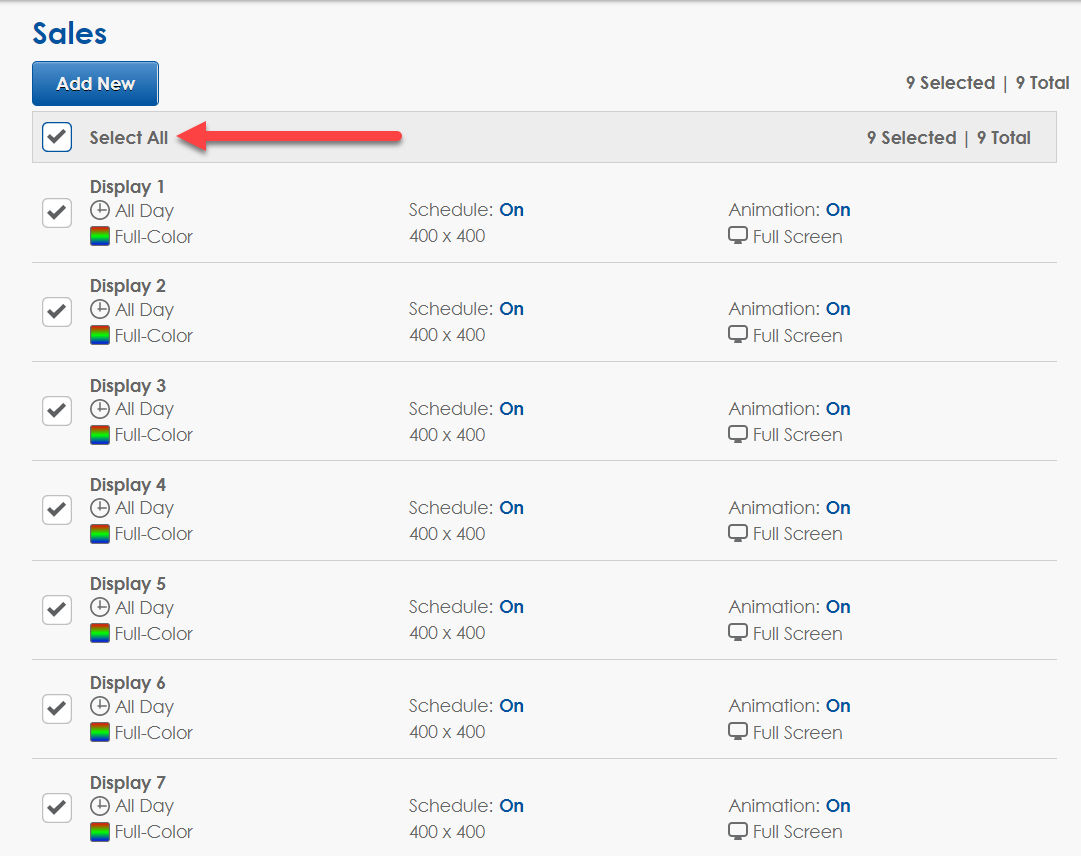
- If you have more than one display, you will now see them all in a list.
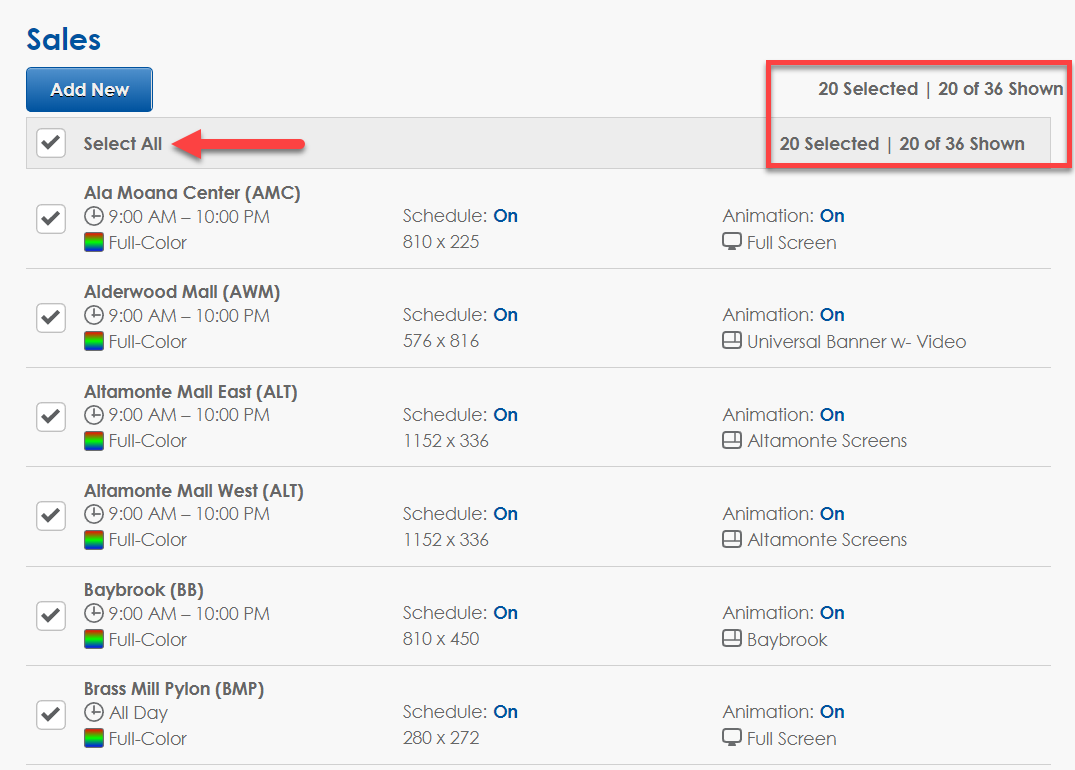
- Checkmark the display(s) you want to make Sales to. If necessary, you can even click on Select All to save time.
![Select All]()
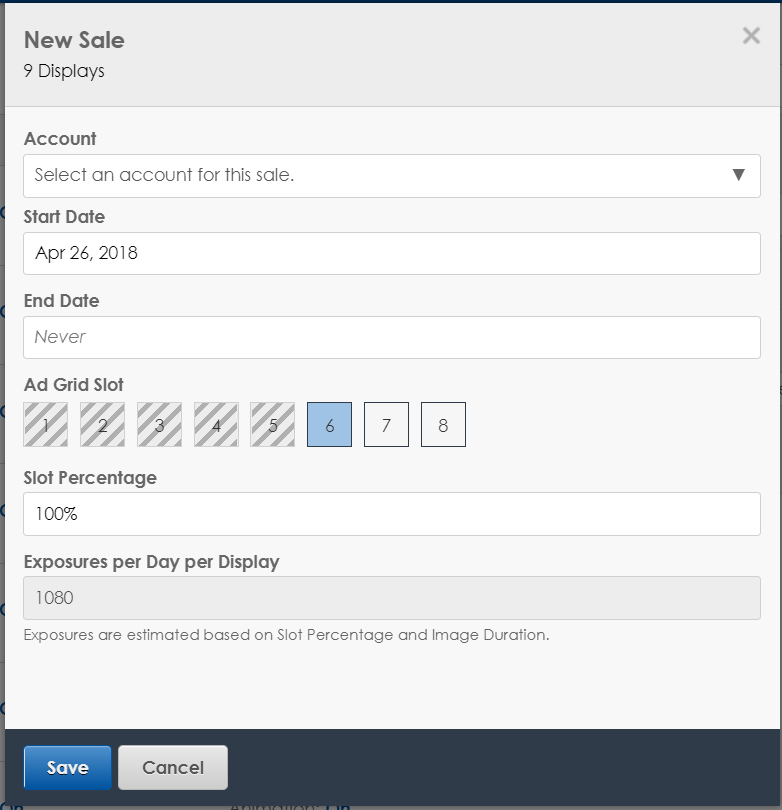
- You will now see a New Sale window that lets you choose an account for this sale, type in Start and End Dates, see what slots are available, select a Slot from the Ad Grid and type in the Slot Percentage. It also gives you an estimate of the Exposures per Day per Display.
![New Sale]()
- When you are finished, click the blue Save button.
Keep in mind that if you already have sales made to individual displays, certain slots may not be available to make Sales to. For example, if you make an individual sale to Slot #1 for “Display A” and then try to make a Group Sale for multiple displays to Slot #1 that includes “Display A,” it will show that Slot #1 is unavailable to make a sale to for the rest of the displays in the group.
You could also potentially receive an error message saying something like, “No open slots from Apr 26, 2018 to No End Date.”
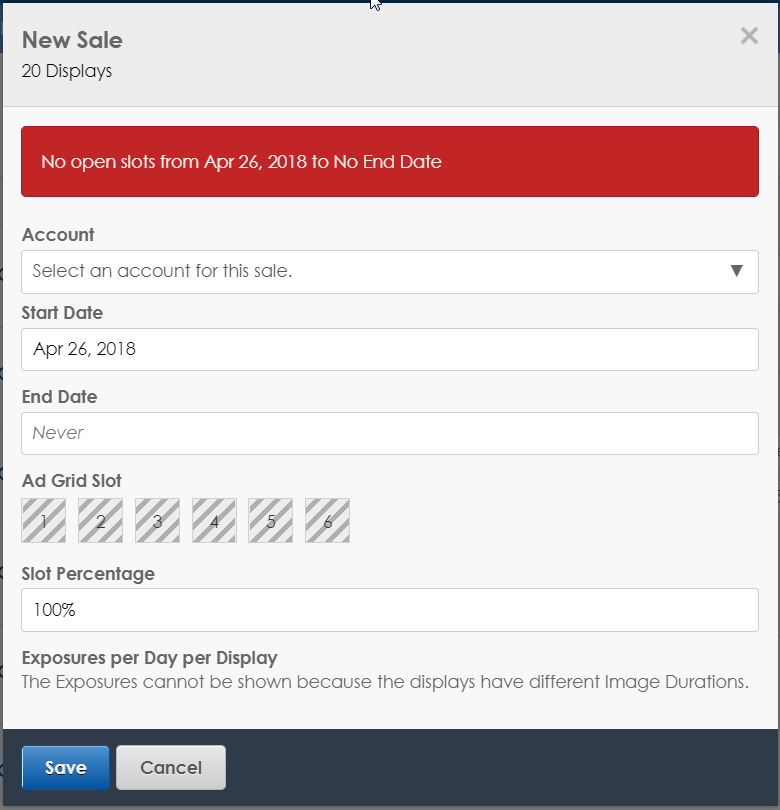
This error appears if there are zero slots available across all displays. To remedy this, you will need to go through the sales for each display to identify which ones share similar open slots. Then, you will be able to select only those displays that have the same open slots available to make up your group.
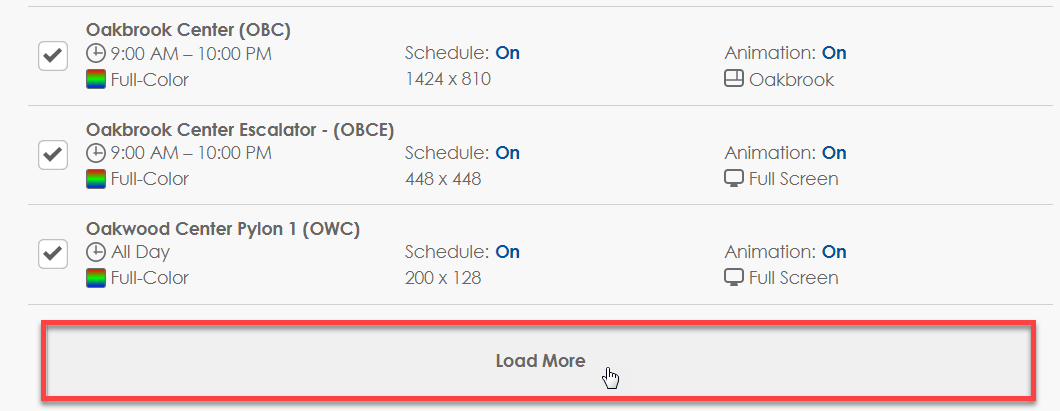
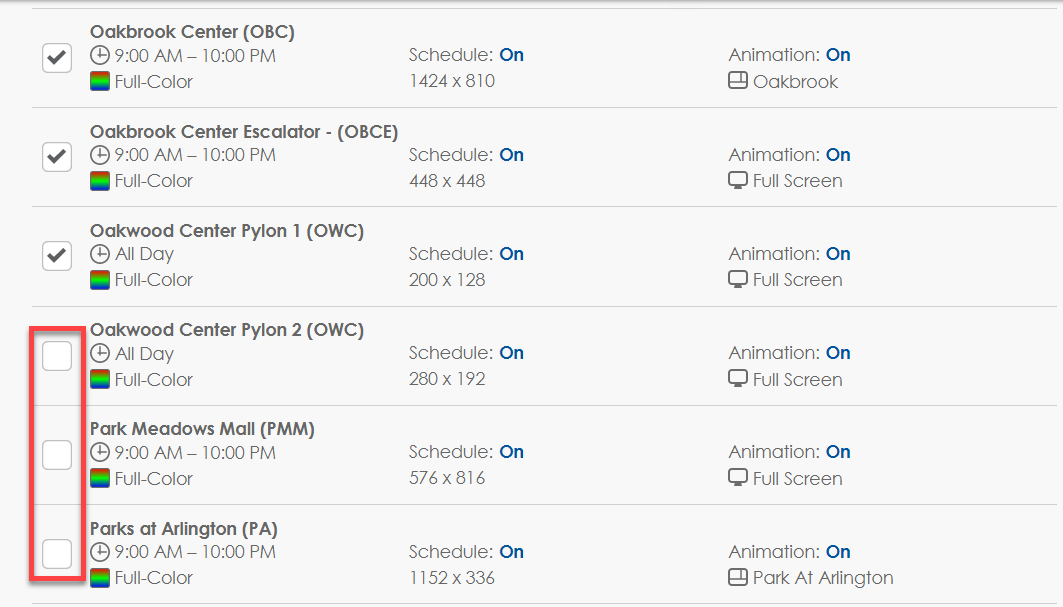
One final thing to keep in mind is that if you choose to Select All when you are grouping your displays, it won’t actually select them all if you have more than 20 displays.
If you do have more than 20 displays, just scroll down and clock the Load More button to see additional displays that you can select.
We hope these updates help you with your content scheduling endeavors. If you do find our blog helpful, be sure to click on the orange “Receive Email Updates” button on the right side of the page to subscribe.
Thanks for reading!