
Using the Timeline Revisited
These last few weeks we have been revisiting some of our most popular blog series. This week is no different! We are going to be take a trip down memory lane to visit our old friend, the Timeline! Timeline Mode in Content Studio for Venus 1500 V4 is an incredibly useful tool. It allows you […]
Daktronics Commercial Software Training on 12/28/2016
Categories: Venus 1500 Training
These last few weeks we have been revisiting some of our most popular blog series. This week is no different! We are going to be take a trip down memory lane to visit our old friend, the Timeline!
Timeline Mode in Content Studio for Venus 1500 V4 is an incredibly useful tool. It allows you to change the duration of elements in your layout, choose when you want certain elements to show up in your presentation, lock elements in place once you have them right where you want them, and so much more!
Using the Content Studio Timeline Part 1, posted on June 25, 2014
In the first post of a 5-part series we discuss the basics of the Timeline. When you first install Venus 1500 V4, the default view in Content Studio is the Layout Storyboard. If you want to enable the Timeline View you will have to click on the Application Menu (Orange V) in the upper left corner of Content Studio, and then click on the Content Studio Options button at the bottom of the dropdown menu. From there you will click on Plugins and put a checkmark next to Enable Timeline and click OK.
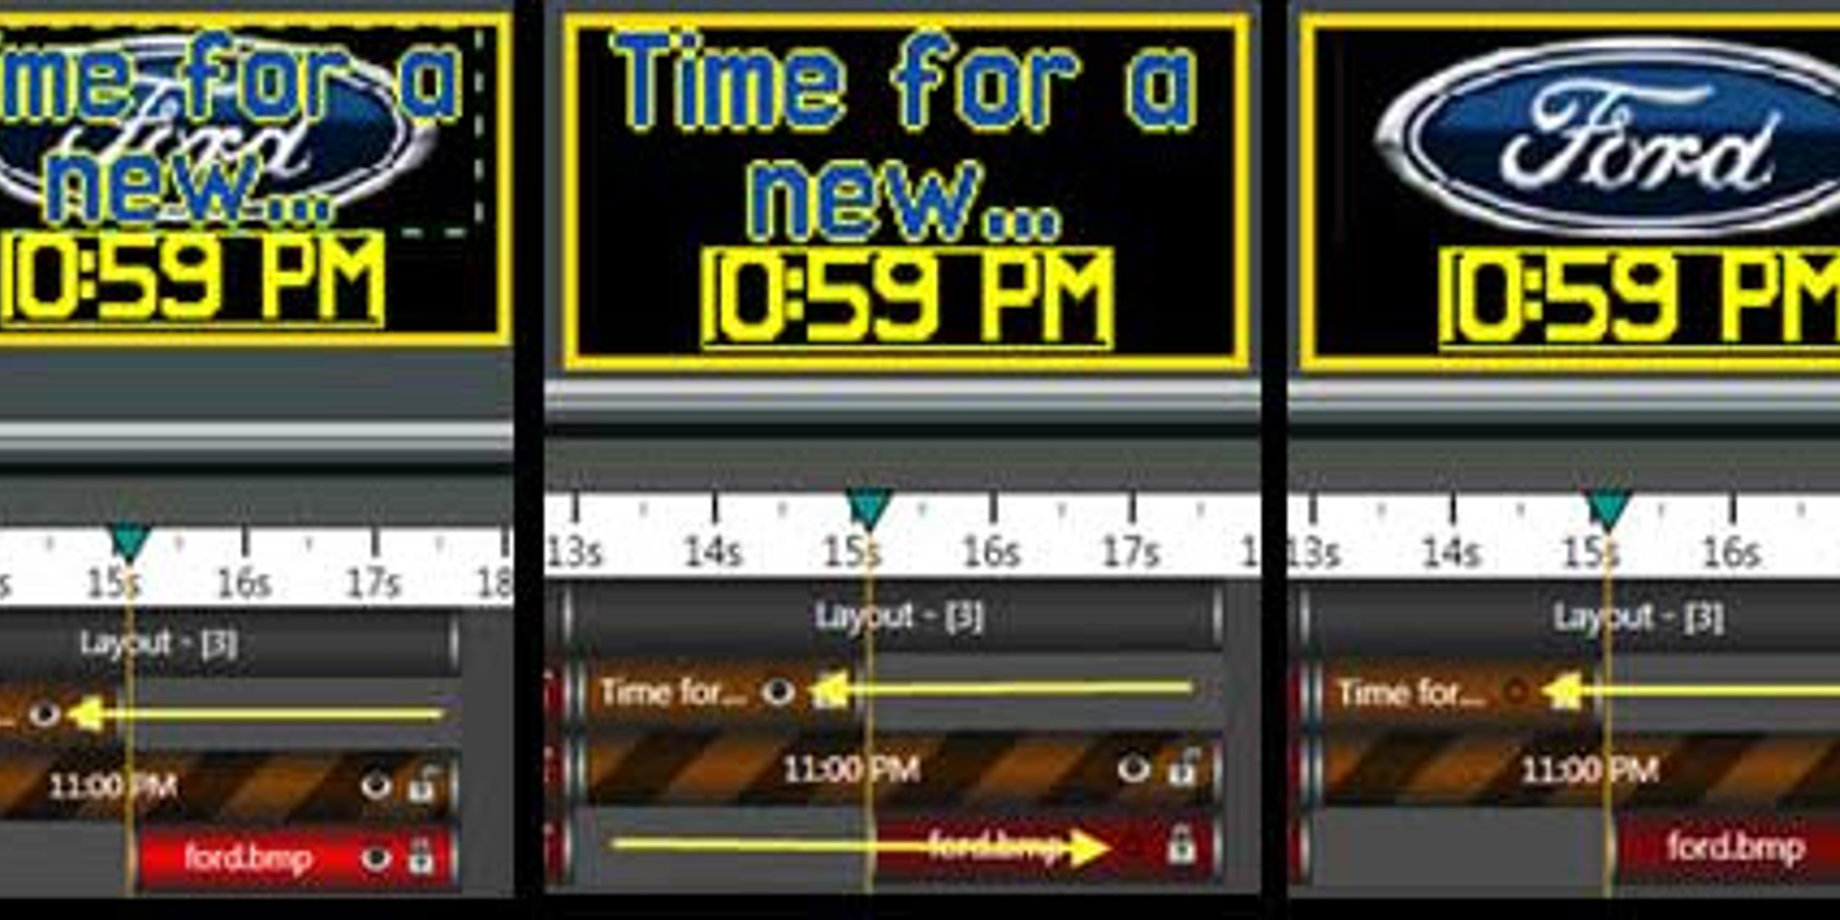
Once the Timeline is enabled you will be able to choose when you want your elements to show up in your presentation. All you have to do is hover over the gray end cap located at the ends of each of your elements and your mouse will turn into a double-sided arrow. Now you can click and drag your element along the timeline to choose when it starts, ends, and how long it will appear! Just remember to always leave at least one element bar the same length as the gray layout bar to avoid blank time on your display.
To read the full article, please click the following link: Using the Content Studio Timeline Part 1
Using the Timeline Part 2, posted on July 2, 2014
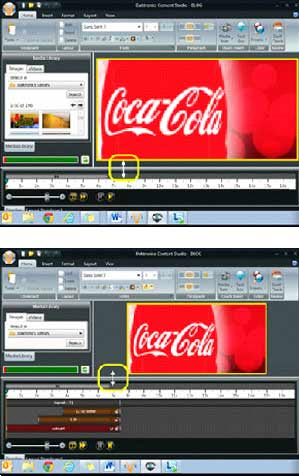
The 2nd post in our series provided tips on resizing and identifying content. You can actually expand the Timeline to make it easier to work with multiple objects or you can shrink it down to give yourself more room for presentations with many elements. All you have to do is hover your mouse over the gray boundary line between the Timeline and the presentation window. Your mouse will again turn into a double-sided arrow allowing you to click and drag the gray boundary line making the timeline larger or smaller.
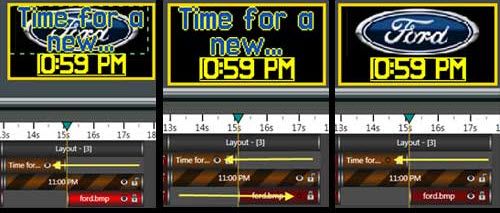
The Timeline is also useful when it comes to identifying what different elements in your presentation are. You already know about the gray layout bar, which represents your layout as a whole. However, other elements are identified by different colors. Entry Transitions appear as the color teal. Real-Time Data like time/temp/date appear as orange and brown stripes. Text boxes show up as solid orange. Images and Videos appear as red element bars. Scrolling text messages are green in color.
To read the full article, please click the following link: Using the Timeline Part 2
Using the Timeline Part 3, posted on July 9, 2015
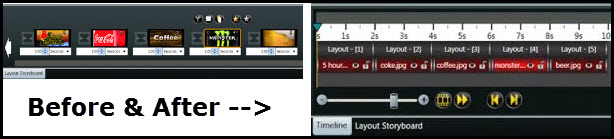
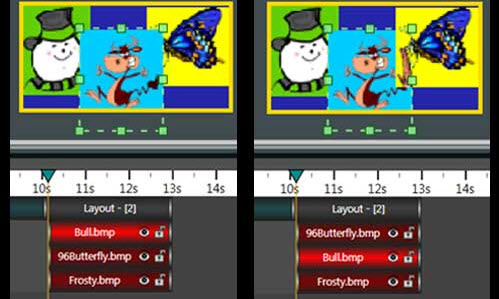
Did you know that the element bars in the timeline are listed in the same order that they are layered in your layout, from top to bottom? You can actually change the order of elements within your layout by clicking on an element bar and dragging it above or below other element bars. The element bar on the top will appear above the elements below it in your layout.
Trainer Tip: You will be able to tell which element you have selected in your layout because whenever you click on an element bar, the corresponding element in your layout will have a green dotted border around it.
You can also move from one layout to another by simply clicking and dragging the element bar from left to right or vice versa and dropping it under the layout you want it to appear on. If you want to copy an object from one layout and put it another layout as well, then simply click on the element bar you wish to copy and hold down Ctrl+C on your keyboard and then click on the layout bar you want to paste it on and hold down Ctrl+V on your keyboard.
To read the full article, please click the following link: Using the Timeline Part 3
Using the Timeline Part 4, posted on July 16, 2014
Have you ever wondered what those little icons on your element bars are? One of them looks an awful lot like an eye! Well that is actually known as the Visible/Hide icon and it allows you to show or hide an element in your layout. When there are many elements within a single layout, you may find it helpful to hide some of them to work on other elements. Simply click on that eye to make it disappear on the elements you wish to hide for the time being. When you are finished, click to put the eye back in place and your elements will appear back in the layout as you had them before.
There’s also a padlock on each element bar, and this is known as the Locked/unlocked Icon and allows you to lock elements in place so they aren’t accidentally moved or modified if you click on them by mistake. Simply click the padlock on the element you want to lock in place and now it cannot be edited. If you do want to make changes to it down the road, then click the padlock to unlock it and make your changes.
To read the full article, please click the following link: Using the Timeline Part 4
Using the Timeline Part 5, posted on July 23, 2014
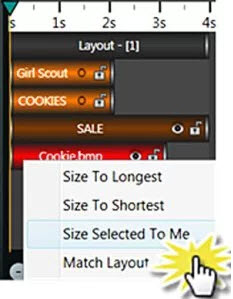
In our final post we showed you that the Timeline has right-click ability! You can adjust the duration of elements, and when they appear in your Timeline by clicking and dragging like we discussed previously. You can also right-click on an element and it will give you a menu with some more exact options to choose from such as “Size To Longest,” “Size To Shortest,” “Size Selected to Me,” or “Match Layout.” These options give you the ability to make your element bar the exact size as the layout, the current longest element bar, the current shortest element bar, or even match other element bars to the size of your selected element bar.
Trainer Tip: You can also choose whether you want to show/hide or lock/unlock elements like we learned about in our 4th post by right-clicking on an element bar and choosing Properties.
If you have many elements under the same layout bar that you want to resize, you can hold down the Control key (Ctrl) on your keyboard to select multiple elements. Once you have all the elements selected you can click on the gray end cap of one of them and drag to make them all move at once.
To read the full article, please click the following link: Using the Timeline Part 5
Bonus Tip: If you don’t see the Timeline Tab in your Content Studio, then click the following link for simple instructions on how to enable the Timeline.
How do I view/disable/enable timeline in Content Studio?
There is so much helpful information about the Timeline in this post, but if you want even more, then be sure to read the full posts from the links we provided above!
Like we always say, thanks for reading!