
Keeping Tabs on Your Tabs: Layout Storyboard & the Timeline (Content Studio)
Learn all about the Layout Storyboard and Timeline Tabs in Content Studio.
Daktronics Commercial Software Training on 5/2/2018
Categories: Venus 1500 Training
Welcome to the final post in our series focusing on Tabs! This week, we will be looking at a couple of tabs found in the bottom portion of Content Studio. One of these tabs appears by default and the other one you have to enable yourself. We will show you how to do just that, along with how to use both tabs. Here we go!
Layout Storyboard
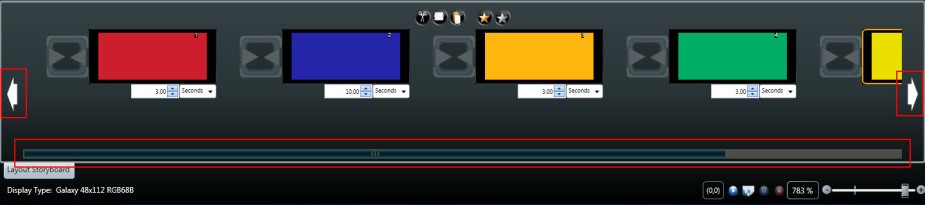
The Layout Storyboard is the default setting upon the installation of the Venus 1500 V4 software. It appears below the Layout and Media Library. You can view miniature representations of each layout in your presentation within the Layout Storyboard. Each miniature layout will be numbered accordingly.
Trainer Tip: If you do happen to have more than one layout in your presentation, you can simply click, drag and drop these miniature layouts to rearrange them and put them in a different order.
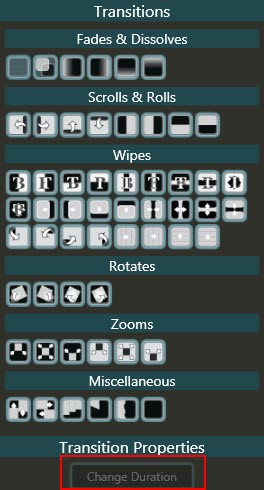
Each layout represented in the Layout Storyboard also has an icon to the left of it that looks like an hourglass. You can click on this hourglass icon to see a list of transitional effects to choose from.
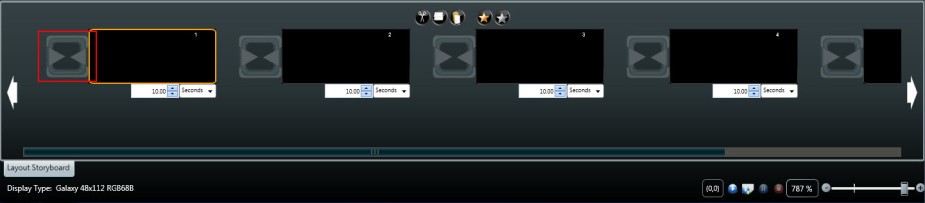
Once you see the list pop up, you can click on any one of the effects to apply it to the selected layout. The selected layout is the layout that you clicked on; it has a gold border around it. You can even adjust the duration of the transition, as well!
The hourglass icon isn’t the only place you can add transitions to the selected layout, though. You can also click on the Layout tab on the ribbon running across the top of Content Studio.

You can even click on the gold star icon in the middle of the Layout Storyboard to choose one transition to apply to every layout in your presentation. So, if you like a certain transition, clicking on the gold star is the quickest and easiest way to have that same transition play before every layout.
You’re probably wondering to yourself what the silver star icon does when you click on it. Well, to answer your question, it will remove all the transitions from your presentation. Simply click on the silver star and every single transition in the current presentation will disappear.

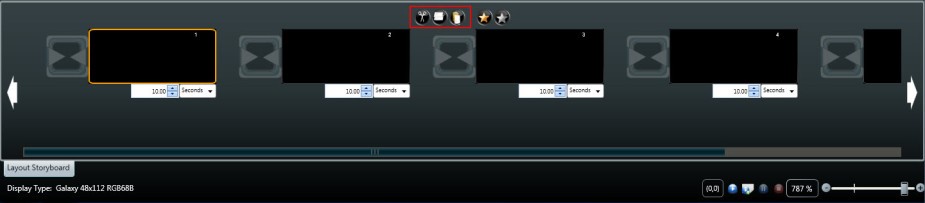
Let’s talk about the other icons in the middle of the Layout Storyboard, now. Directly to the left of the star icons, choose from 3 more icons. These icons are (from left to right) Cut, Copy, and Paste. In order to use this functionality, you must first click on one of the miniature layouts to select it. Once you see the gold border appear around it, simply click on either Cut or Copy and then choose where you want to Paste within your presentation.
Trainer Tip: Did you know that you can even Cut and Copy in one instance of Content Studio and then paste into an entirely different session of Content Studio? How cool is that? This is quite helpful if you have multiple displays that are different sizes and want to play the same content on all of them. Click on the link below for step-by-step instructions if you’re interested.
You can also use your keyboard shortcuts to Cut, Copy, and Paste as well. Simply click on Ctrl+C to Copy and Ctrl+V to Paste, or Ctrl+X to Cut and Ctrl+V to Paste.
Right-clicking on the miniature layouts also gives you the options to Cut, Copy, and Paste, as well as the ability to add a new layout or insert a new layout to your presentation, or delete the selected layout from your presentation.
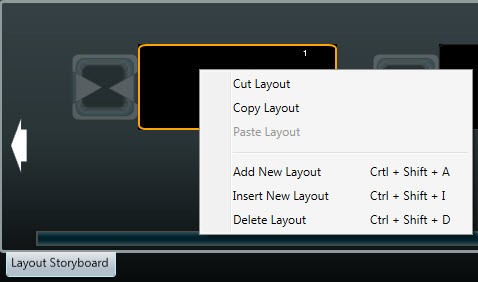
You can also find the options to Add, Insert, or Delete layouts in the ribbon bar running across the top of Content Studio in the Home Tab.

Adding a layout will place a new one at the end of your presentation. Inserting a layout will insert a layout in front of the selected one, and deleting a layout will remove the layout from your presentation entirely.
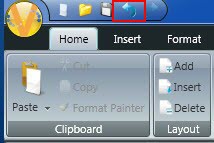
Don’t worry, though! If you click delete layout by accident, there is an undo arrow button in the upper-left corner of Content Studio. Click on it to reverse the damage!
Speaking of arrows, you more than likely noticed the white arrows on either side of the Layout Storyboard. If you have several layouts in your presentation, you can click on these arrows to scroll through your presentation and see all of them. You can also click and drag the scroll bar at the bottom.
Enabling the Timeline
As I mentioned earlier, you will have to enable the Timeline each time you download the Venus 1500 V4 software because the Layout Storyboard is the default setting. So if you reimage your computer, or get a new computer, and do not see the Timeline tab after you get Venus 1500 V4 reinstalled, simply follow the same instructions (below) as you did when you first installed the software and enabled the Timeline.
- Open Content Studio by going to the Content Tab in the Venus 1500 Hub and clicking on the blue Create button.
![Step 1]()
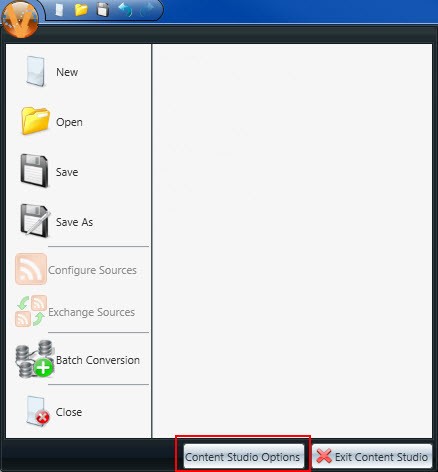
- Click on the Content Studio Application Menu (Orange V) in the upper left corner.
![Step 2]()
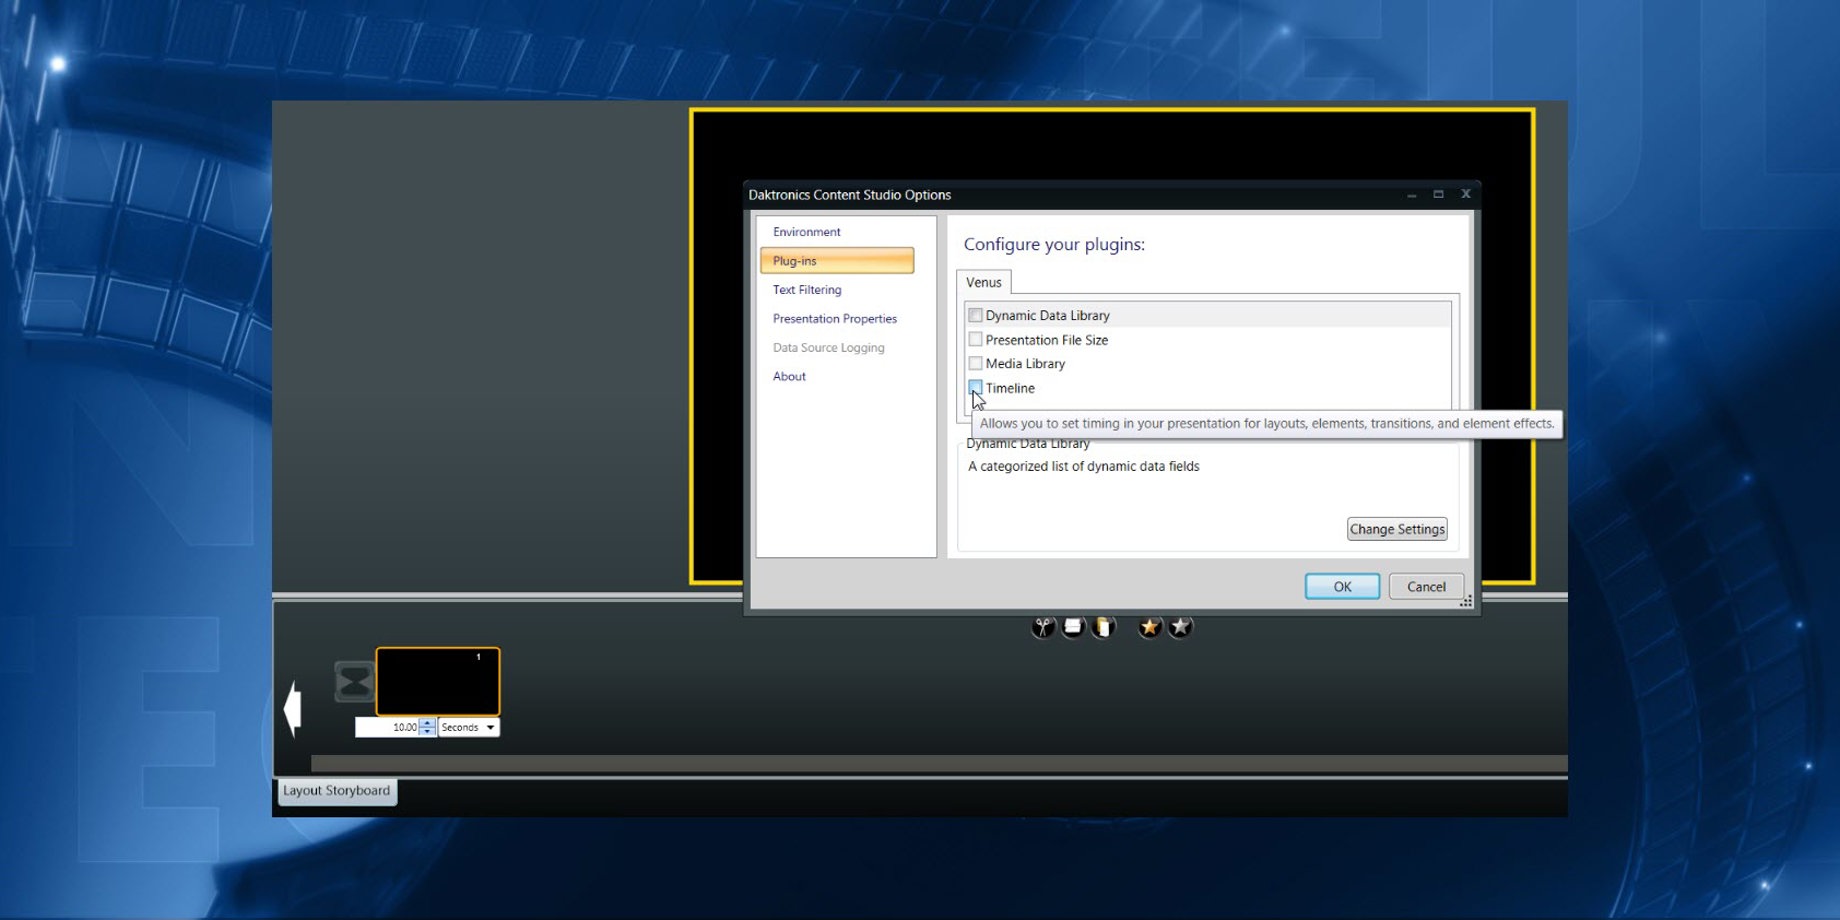
- Click on Content Studio Options on the bottom of the Application Menu.
![Step 3]()
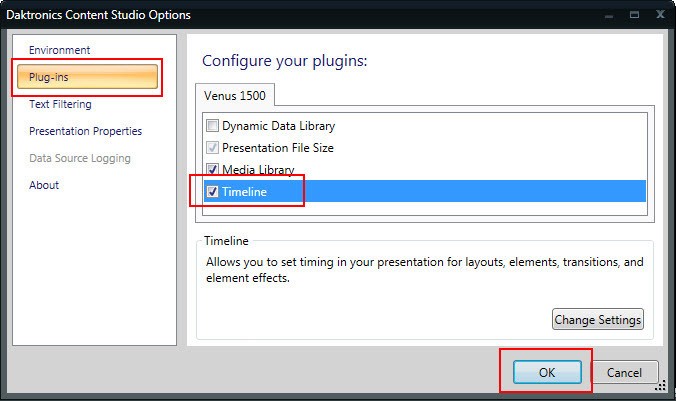
- Click on Plug-ins, found in the Daktronics Content Studio Options window and put a checkmark in the checkbox next to Timeline under Configure your Plugins.
![Step 4]()
- Click OK.


Now you will see two tabs on the bottom left corner of Content Studio: Timeline and Layout Storyboard. The Layout Storyboard view will have changed slightly. You will no longer see the field below the miniature layouts to adjust the layout duration. That is because you will now be able to adjust your layout duration in the Timeline tab!

Within the Timeline, each layout will have its own bar. The layout bar(s) will be gray in color and will be named Layout – [1], Layout – [2], etc. Each layout bar will also have a white edge. You can hover your mouse over these white edges, and your cursor will turn into a double-sided arrow. You can then use the white edges on the ends to lengthen or shorten play duration by simply clicking and dragging.

What is the Timeline’s best feature and the main reason why you will want to enable it? Enabling the Timeline allows you to change the duration of the layout itself, and also the duration of all the different elements inside the layout.
What I am referring to when I say “elements,” are text boxes, images, animations and videos, time temp and date fields, scrolling text messages, and paging elements. Basically, an “element” is anything that you enter into a layout, other than text that you type directly into it.
Each of these elements will have a corresponding color assigned and will also have white edges that you can click and drag. This allows you to have multiple elements within the same layout appear and disappear at different times! The assigned colors are as follows:
- Text Box = Orange
- Pictures and Videos = Red
- Scrolling Text = Green
- Paging elements = Gray
- Time temp and date = Orange and Brown swirls

If you want to make the duration of an element longer, you will first have to make the duration of the layout bar longer. An element cannot be longer than the layout itself. In contrast, you cannot make the layout bar any shorter than the elements below it, so you will first have to shorten the element bars.
Trainer Tip: Avoid blank time on your display! Always remember when adjusting the duration of the elements below a Layout bar to make sure that at least one element is the same length as the layout bar itself.

That looks different!
Now, if you absolutely prefer using the Timeline Tab over the Layout Storyboard, that is perfectly fine. But I do want to show you what changes when you enable the Timeline first.
When the Layout Storyboard is being used before the Timeline is enabled, you can adjust the duration of each individual layout. Enter the duration in the field below each layout or use the arrows and seconds/minutes/hours drop-down menu.

Once you have enabled the Timeline, that option goes away, so you will no longer be able to adjust the duration of each layout within the Layout Storyboard. Instead, you will use the Timeline to adjust the duration of each element, including the layouts themselves.

All right, now that you know all about the Layout Storyboard, we’re going to show you how to disable the Timeline Tab, just in case you want to simplify things!
Remember, by doing this you will only be able to adjust the duration of your layouts as a whole, not any of the elements (text boxes, images/stills, videos/animations) within them.
- Click on the Application Menu (Orange V) in the upper-left corner.
- Click on Content Studio Options.
![CS 2]()
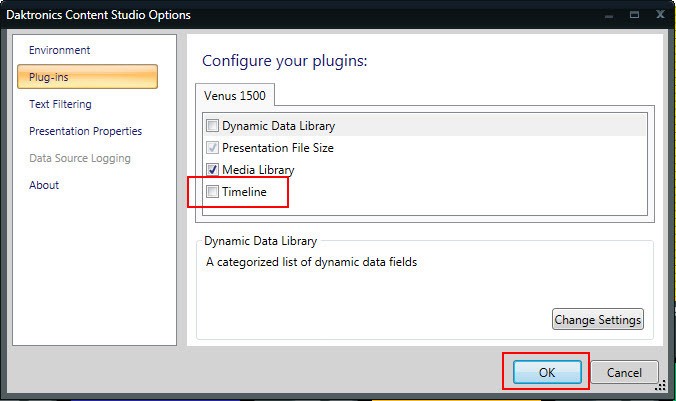
- Click on Plug-Ins.
- Uncheck Timeline.
![CS 5]()
- Click OK.

Previous Posts
So, if you like the Timeline and think you may switch to it, you might be interested to know that we have already written an entire series on how to use the Timeline. We highly recommend checking these out first!
- Using the Content Studio Timeline Part 1
- Using the Timeline Part 2
- Using the Timeline Part 3
- Using the Timeline Part 4
- Using the Timeline Part 5
- Using the Timeline Revisited
We hope you found this week’s post helpful! Be sure to click on the orange “Receive Email Updates” button on the right side of the page to subscribe.
Thanks for reading!